
This publish might comprise associate gross sales hyperlinks. Please learn my disclosure coverage.
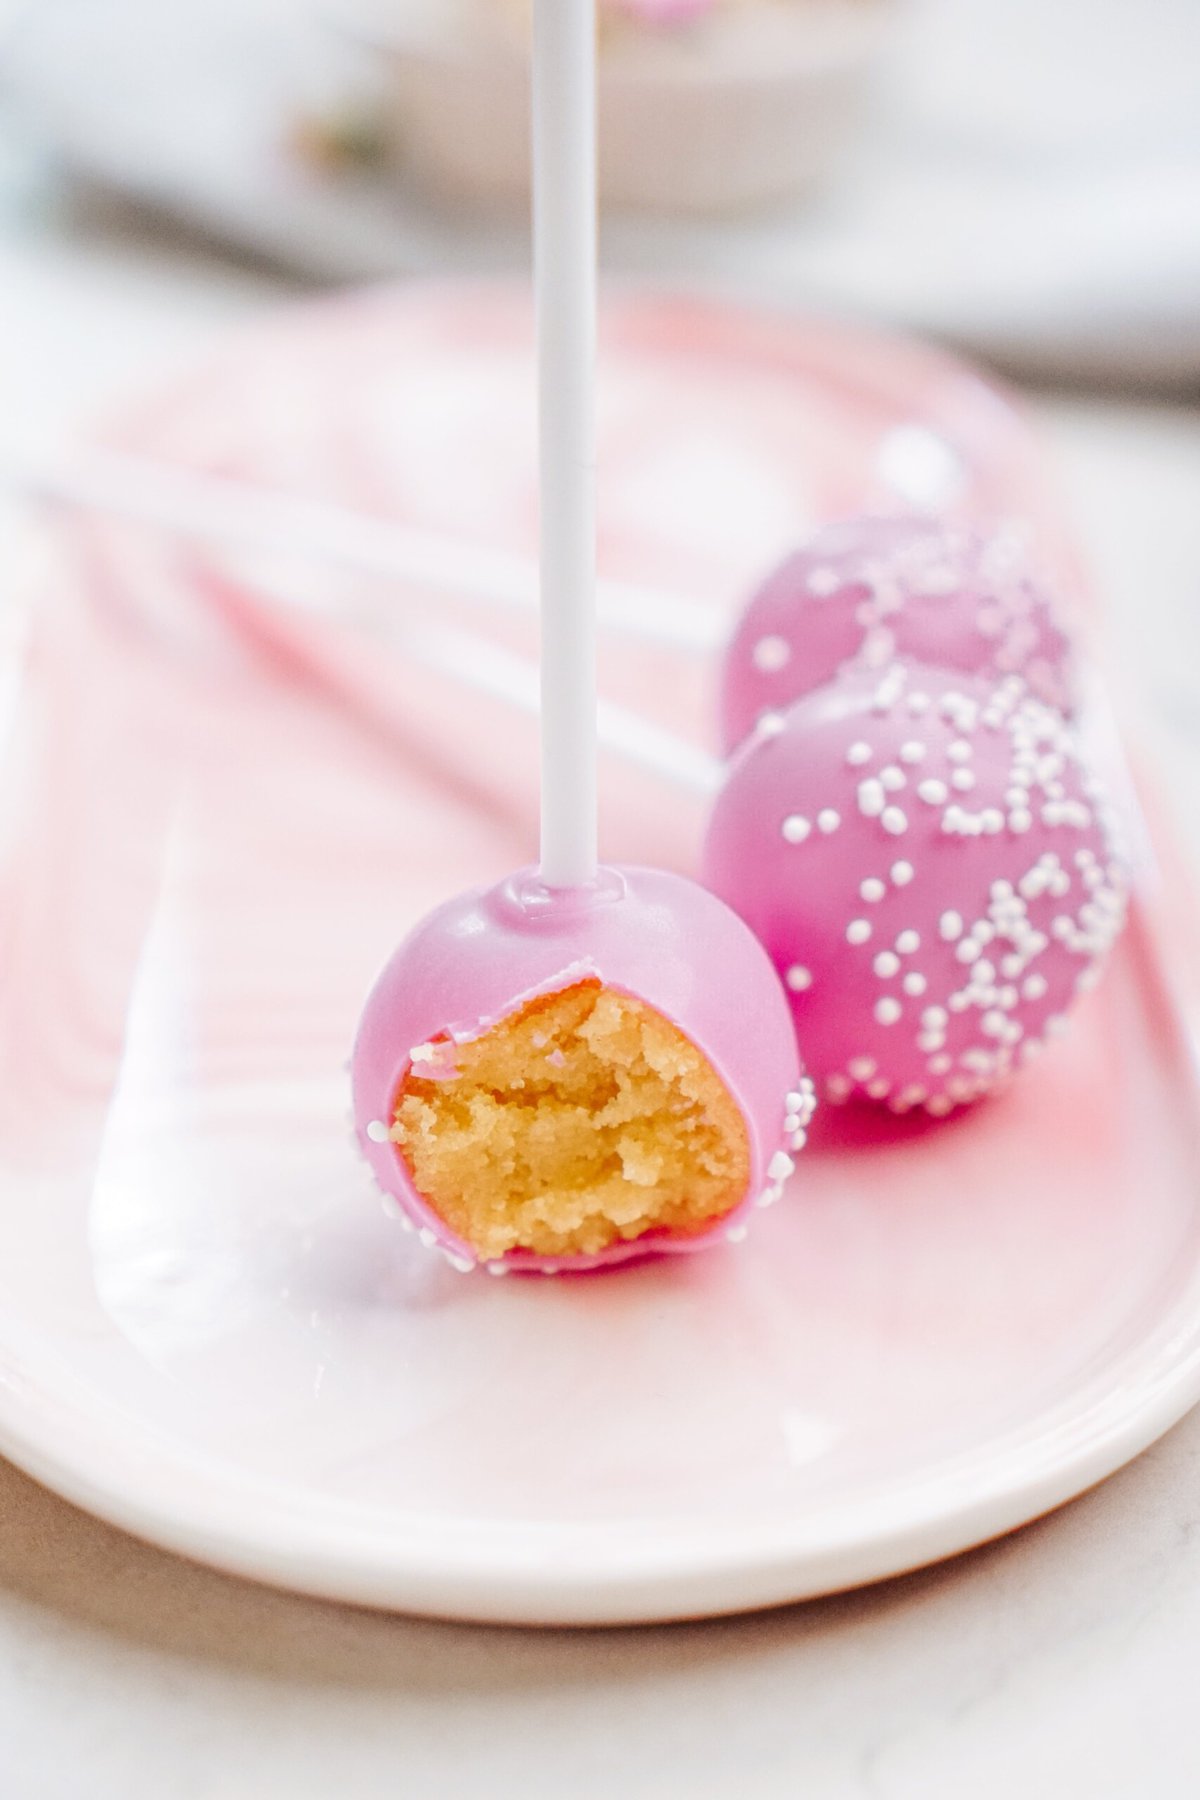
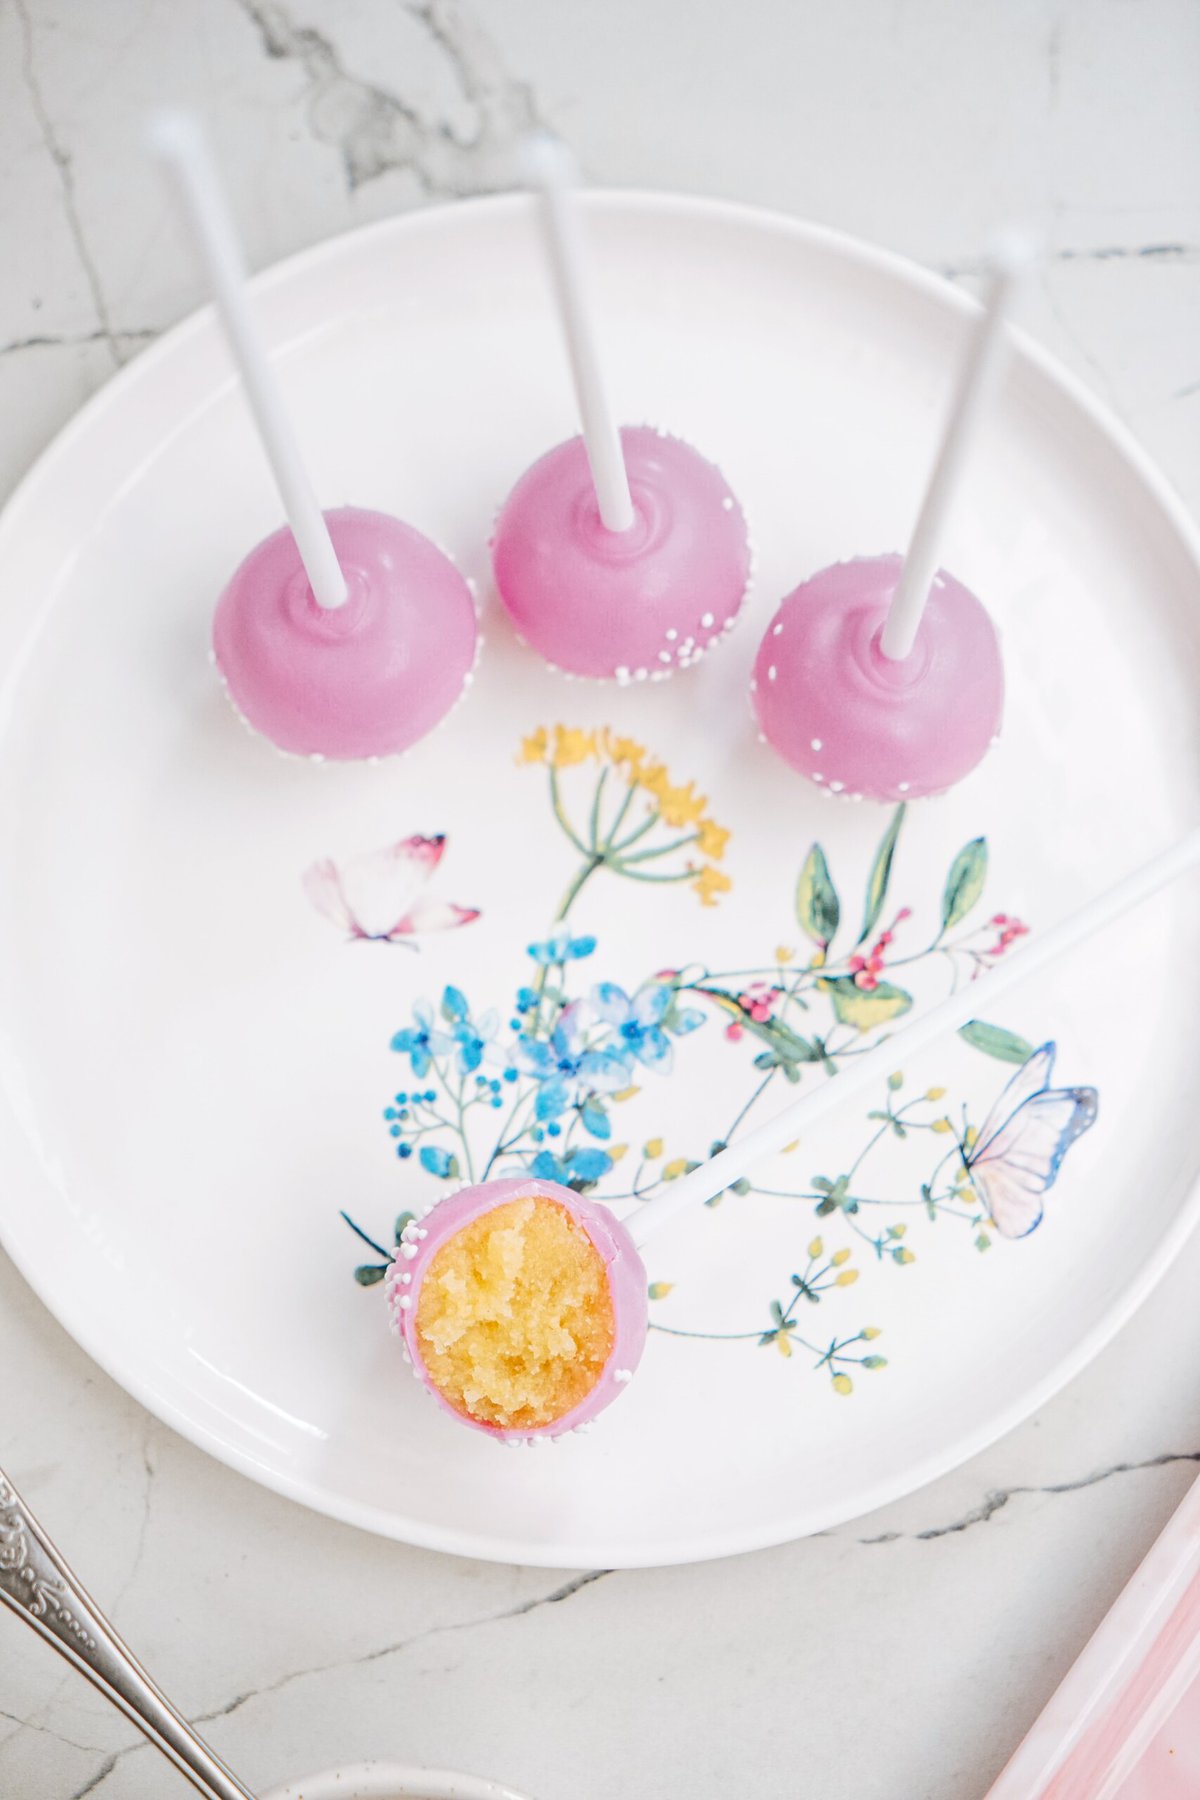
Save your self some cash and a shuttle to Starbies via making my Starbucks Cake Pop Recipe. Made with a vanilla cake base, creamy frosting heart, and a decadent chocolate coating, those bite-sized treats are ideal for birthdays, child showers, or any instance.
Why You’ll Love This Copycat Starbucks Cake Pop Recipe
Searching for a scrumptious candy deal with to pair along with your morning espresso or fulfill your candy enamel? Glance no additional than those Starbucks Cake Pops! Made with easy substances and a couple of simple steps, those copycat Starbucks Cake Pops are an effective way to benefit from the vintage espresso store deal with proper within the convenience of your house.
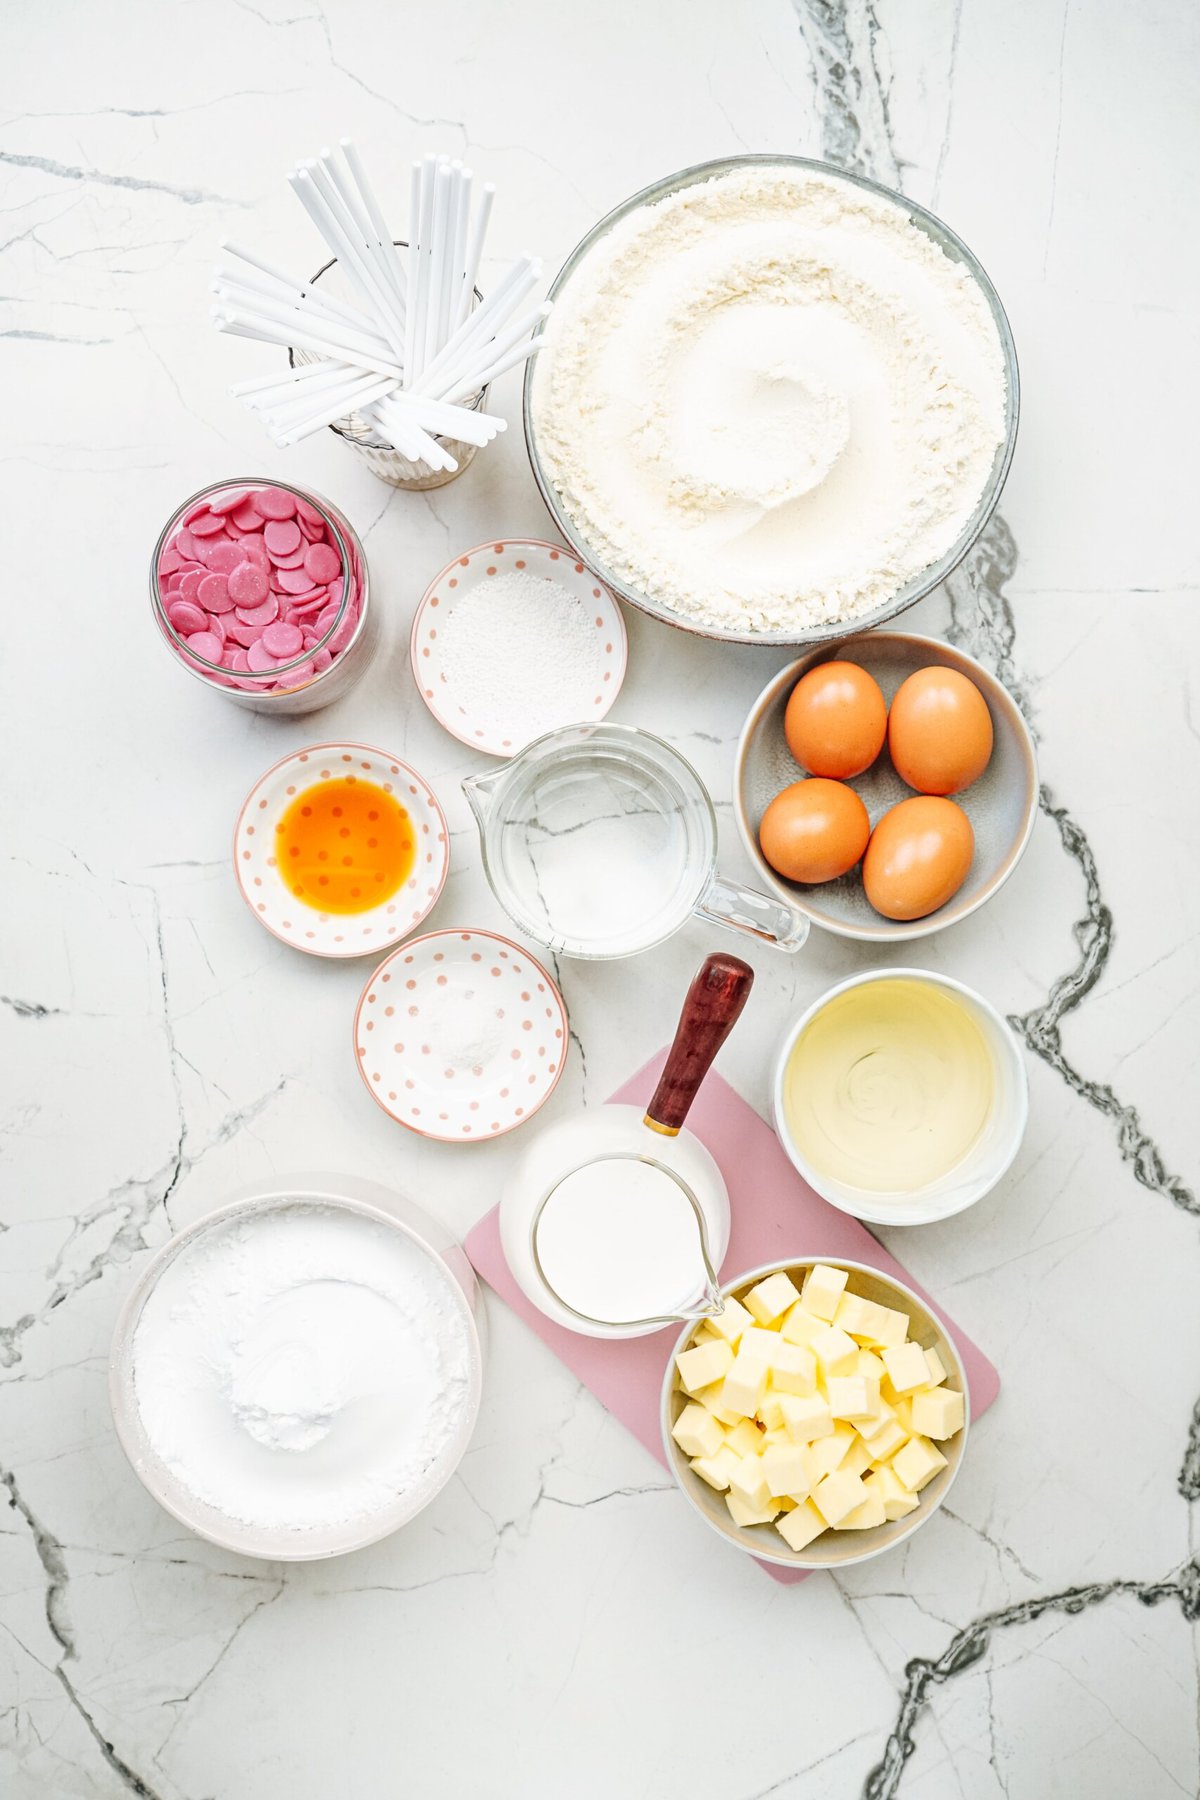
Elements Wanted for Starbucks Cake Pops
- Vanilla Cake Combine: The root of your cake pops, offering that vintage vanilla taste. Be at liberty to make your individual selfmade vanilla cake for this recipe.
- Huge Eggs: Very important for binding the cake aggregate in combination.
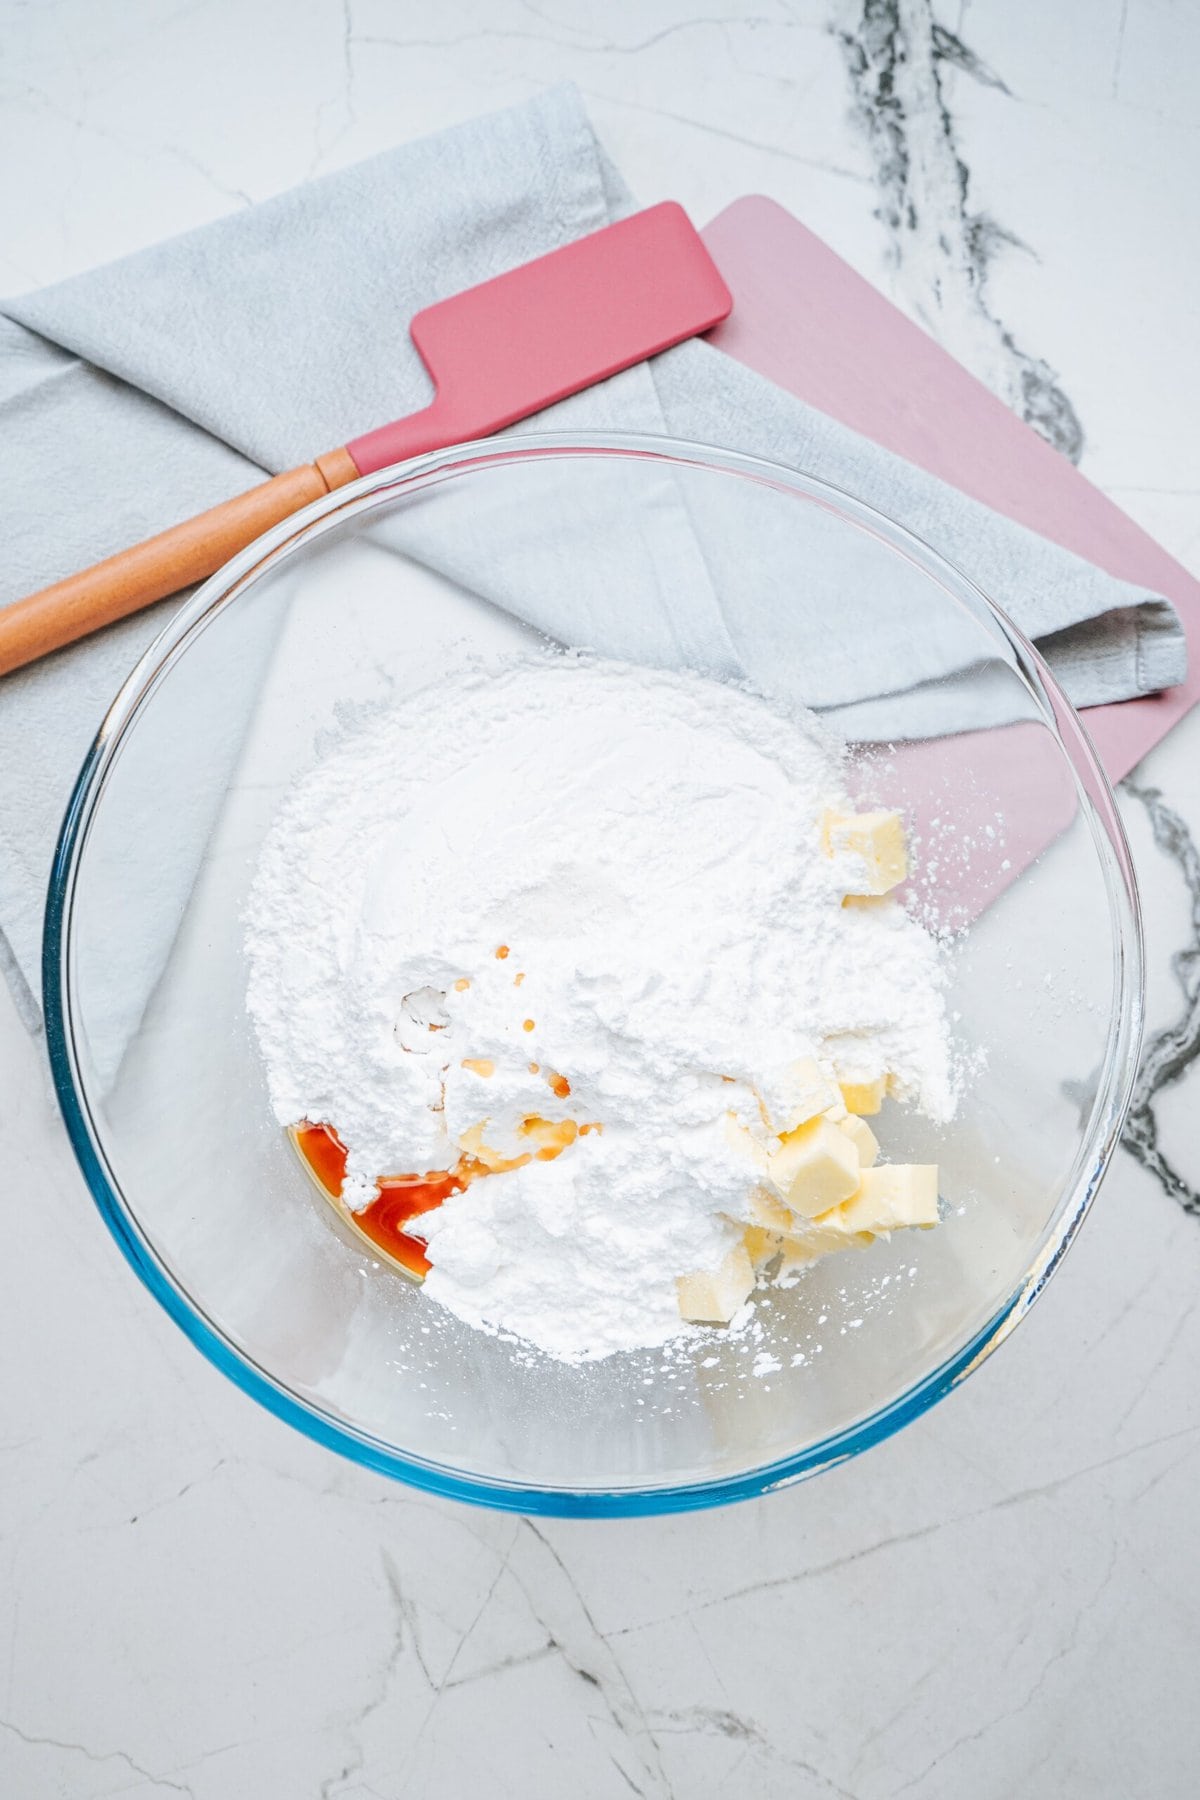
- Vanilla Frosting: use my selfmade vanilla frosting or store-bought. This creamy frosting provides sweetness and holds the cake balls in combination.
- Gentle Crimson Chocolate Melting Wafers: For that iconic Starbucks cake pop glance.
- White Nonpareils Sprinkle Balls: Provides a pleasing crunch and ornamental contact on your cake pops and is what Starbucks makes use of.
- Pantry Staples: vegetable oil, water
Apparatus
- 40 cake pop sticks– you’ll desire a 6″ lollipop sticks to insert into every cake ball.
- cake pop holder– non-compulsory, however tremendous useful whilst your cake pops are drying.
Permutations
- Be at liberty to experiment with other cake flavors comparable to chocolate or crimson velvet for a singular twist.
- Customise your cake pops with quite a lot of coloured melting wafers, sprinkles and jimmies to fit other subject matters or events.
The right way to Make Starbucks Cake Pop Recipe
For complete recipe main points, together with component measurements, see the printable recipe card beneath on the backside of this publish. Listed below are step by step directions for making and developing those copycat Starbucks Cake Pops:
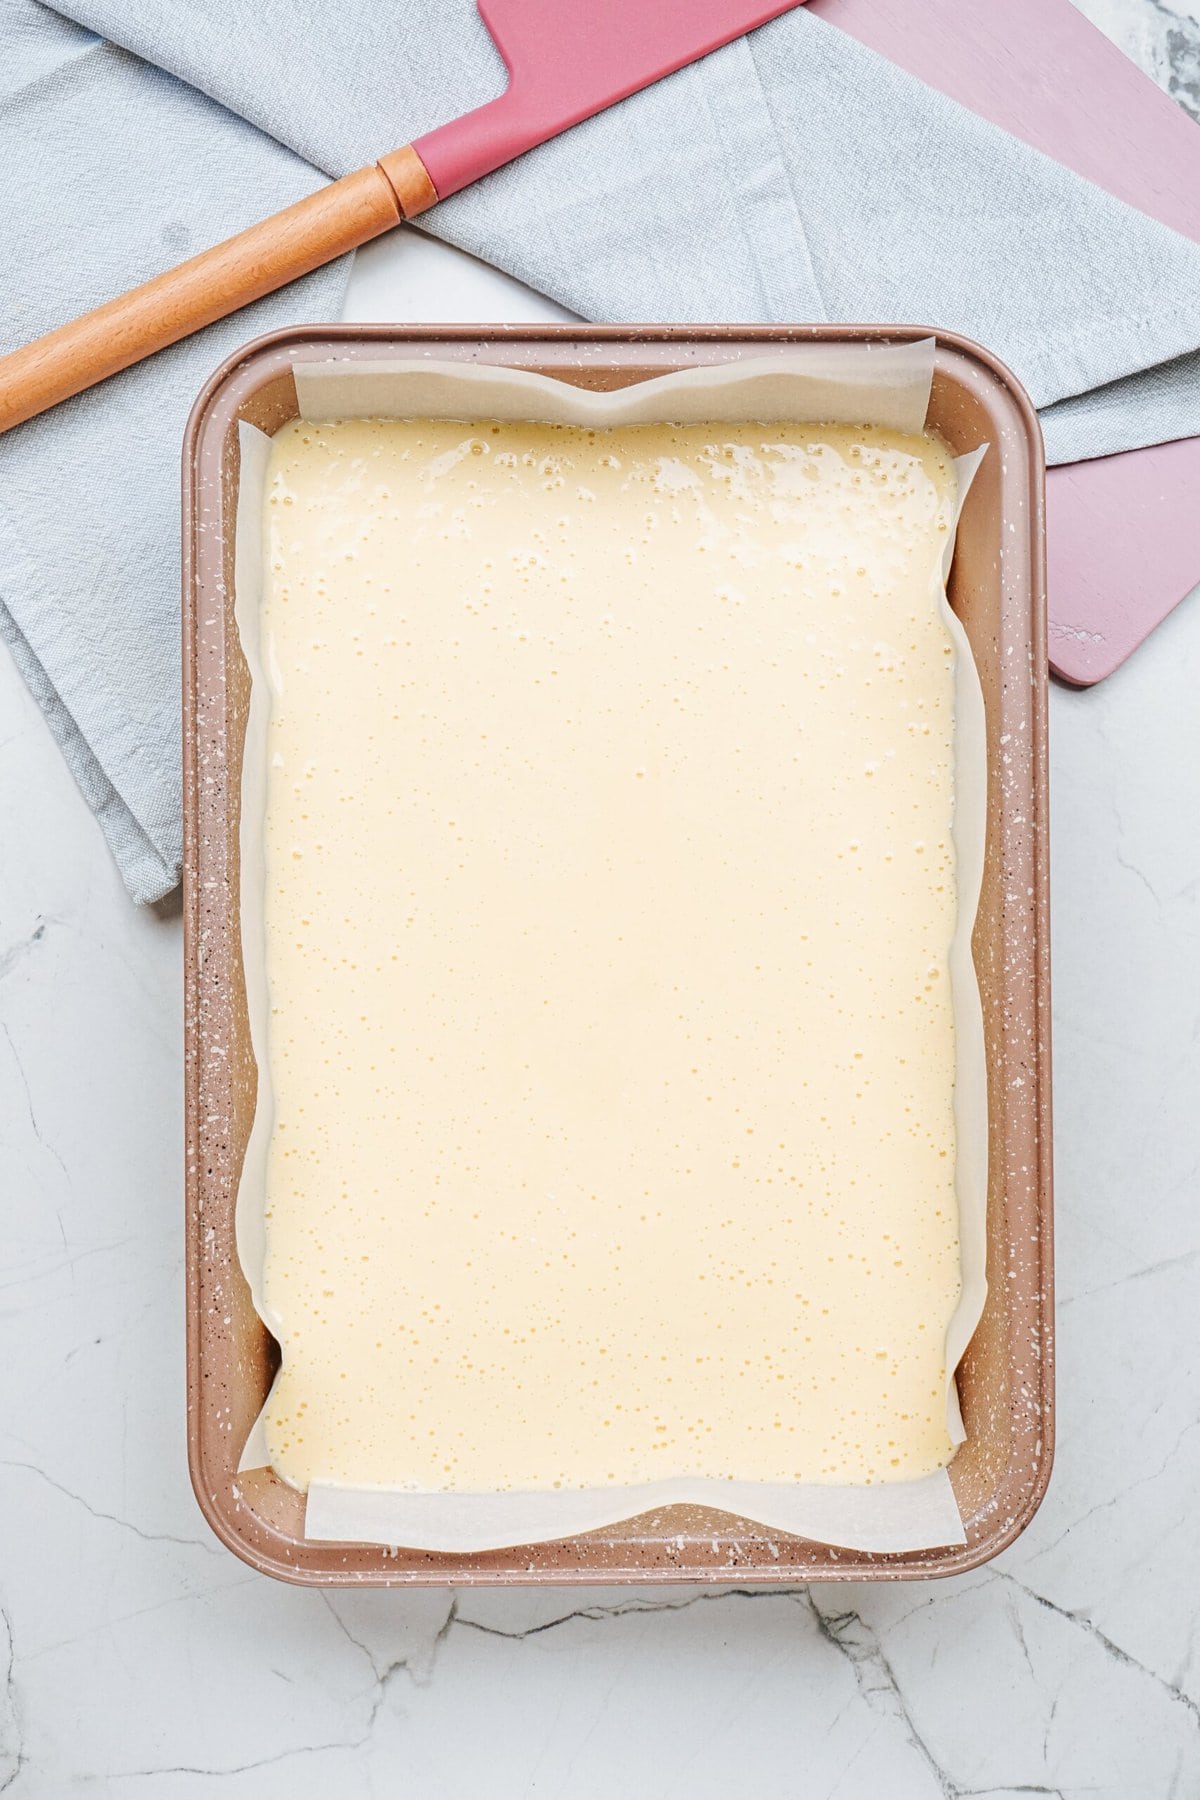
1. Preheat Oven
Preheat oven to 350° F (or no matter your cake combine calls for). Spray a 9×13 cake pan with non stick cooking spray. Put aside.
2. Make + Bake Vanilla Cake
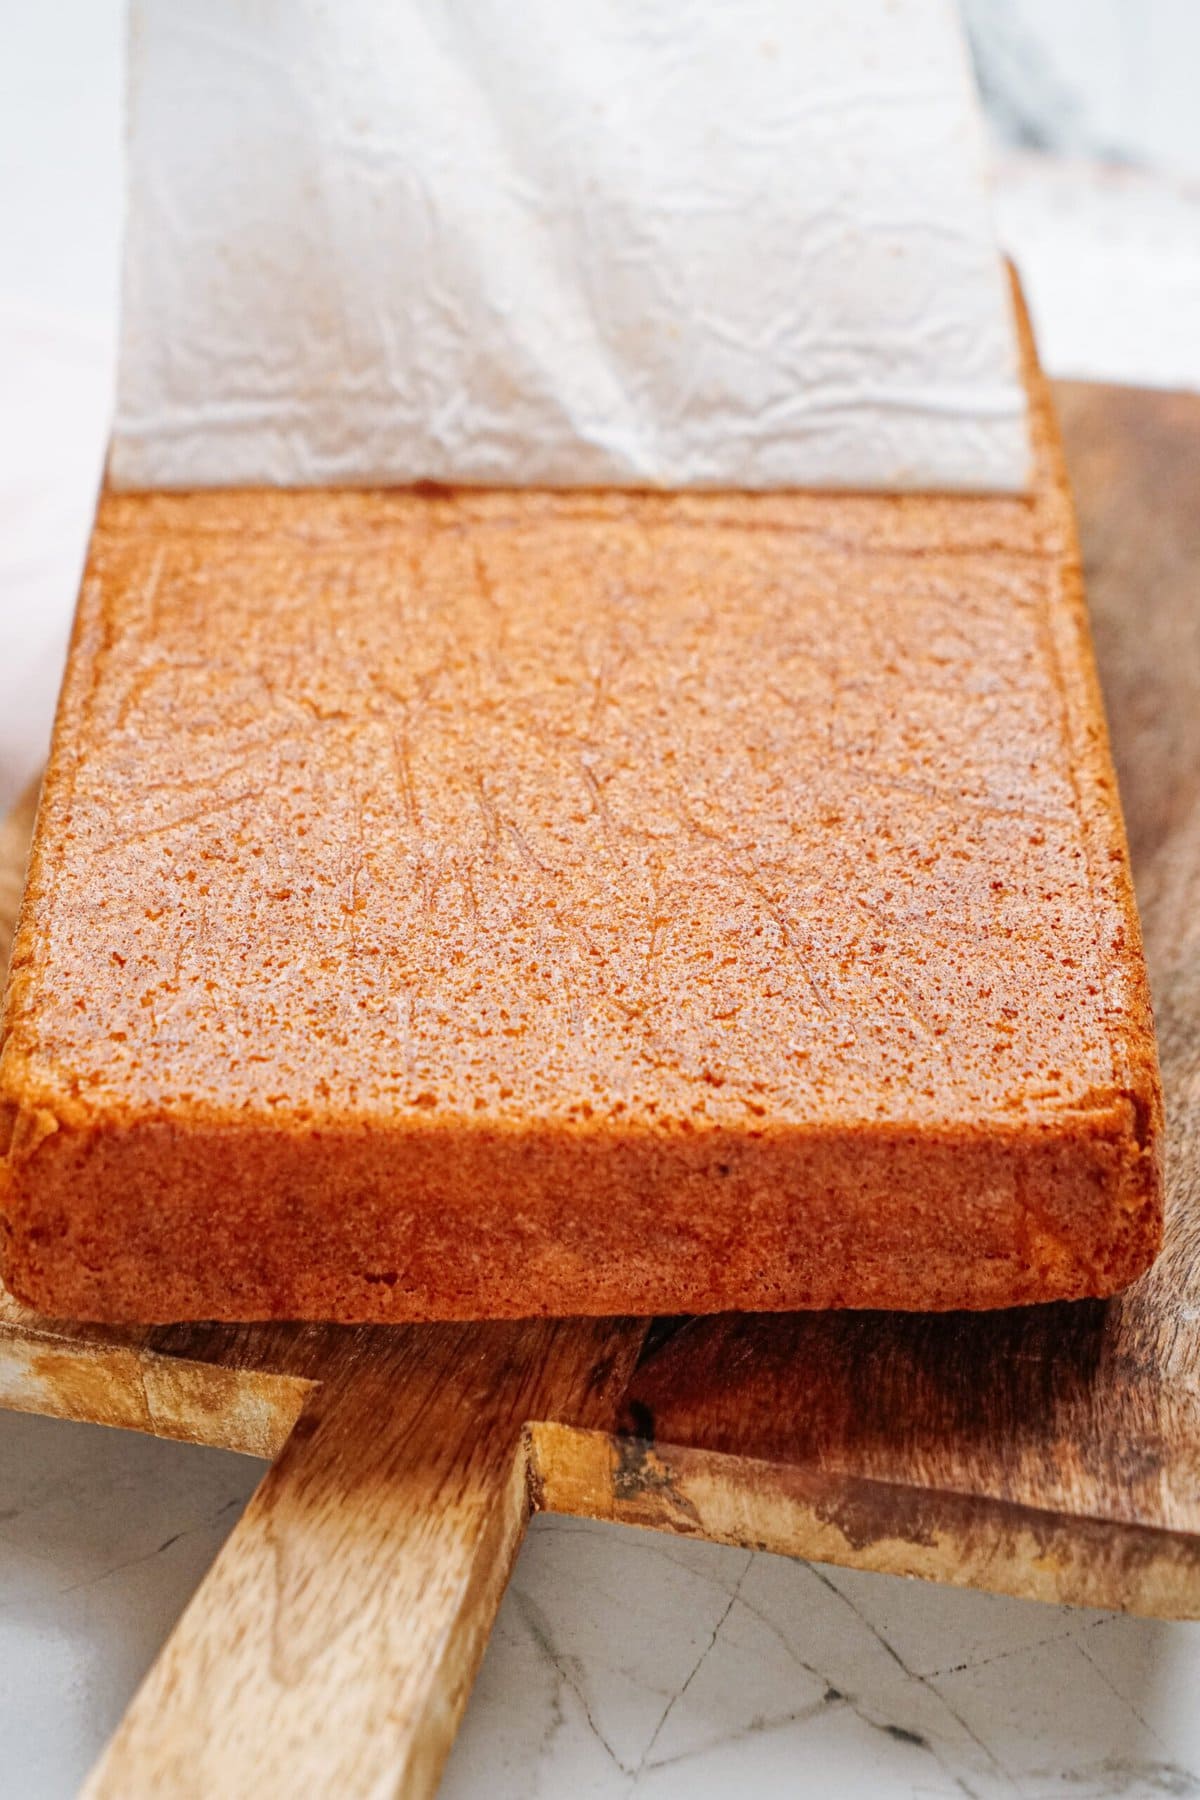
In a big bowl, combine cake combine and different substances indicated at the field in combination. Then bake cake consistent with bundle instructions. Permit to chill utterly.
Relying on which logo of cake combine you utilize, you could want to alternate the measurements for eggs, oil, and water indexed.
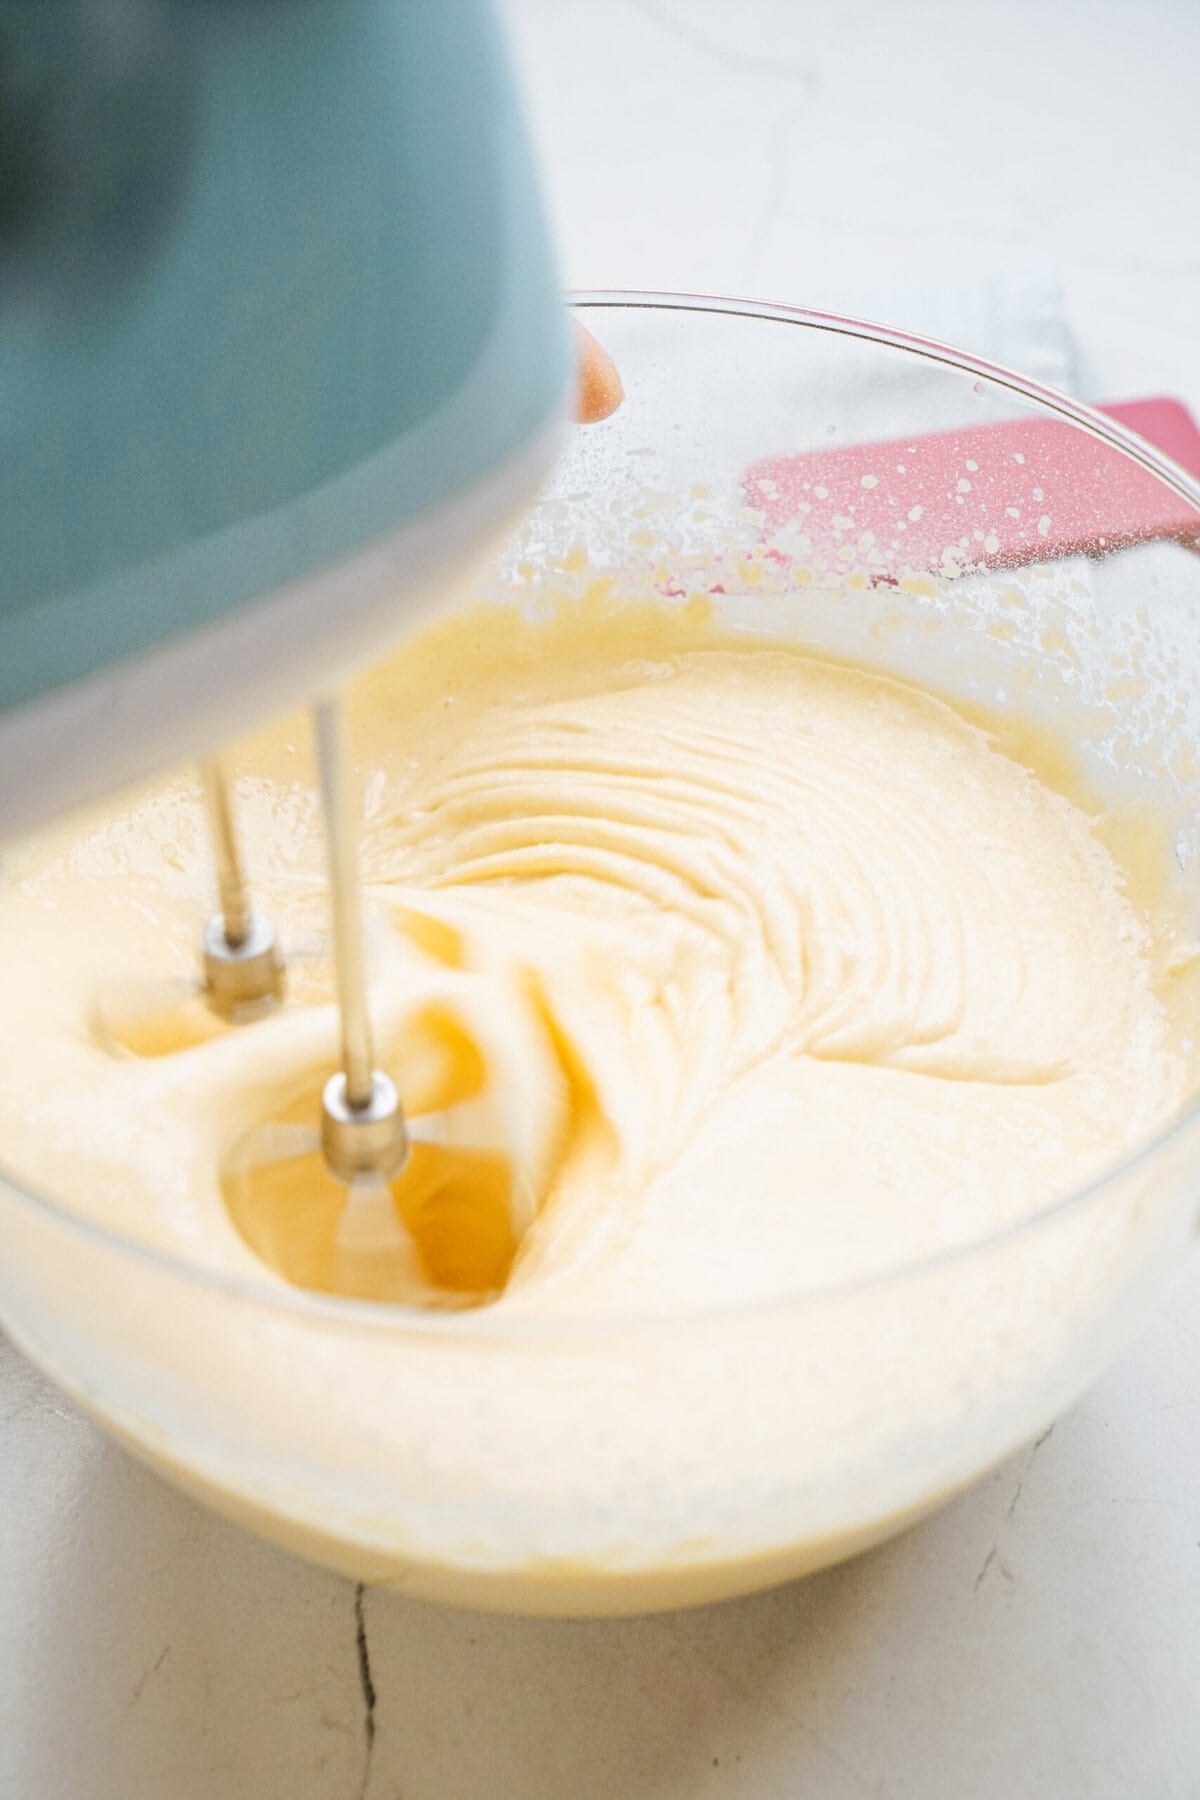
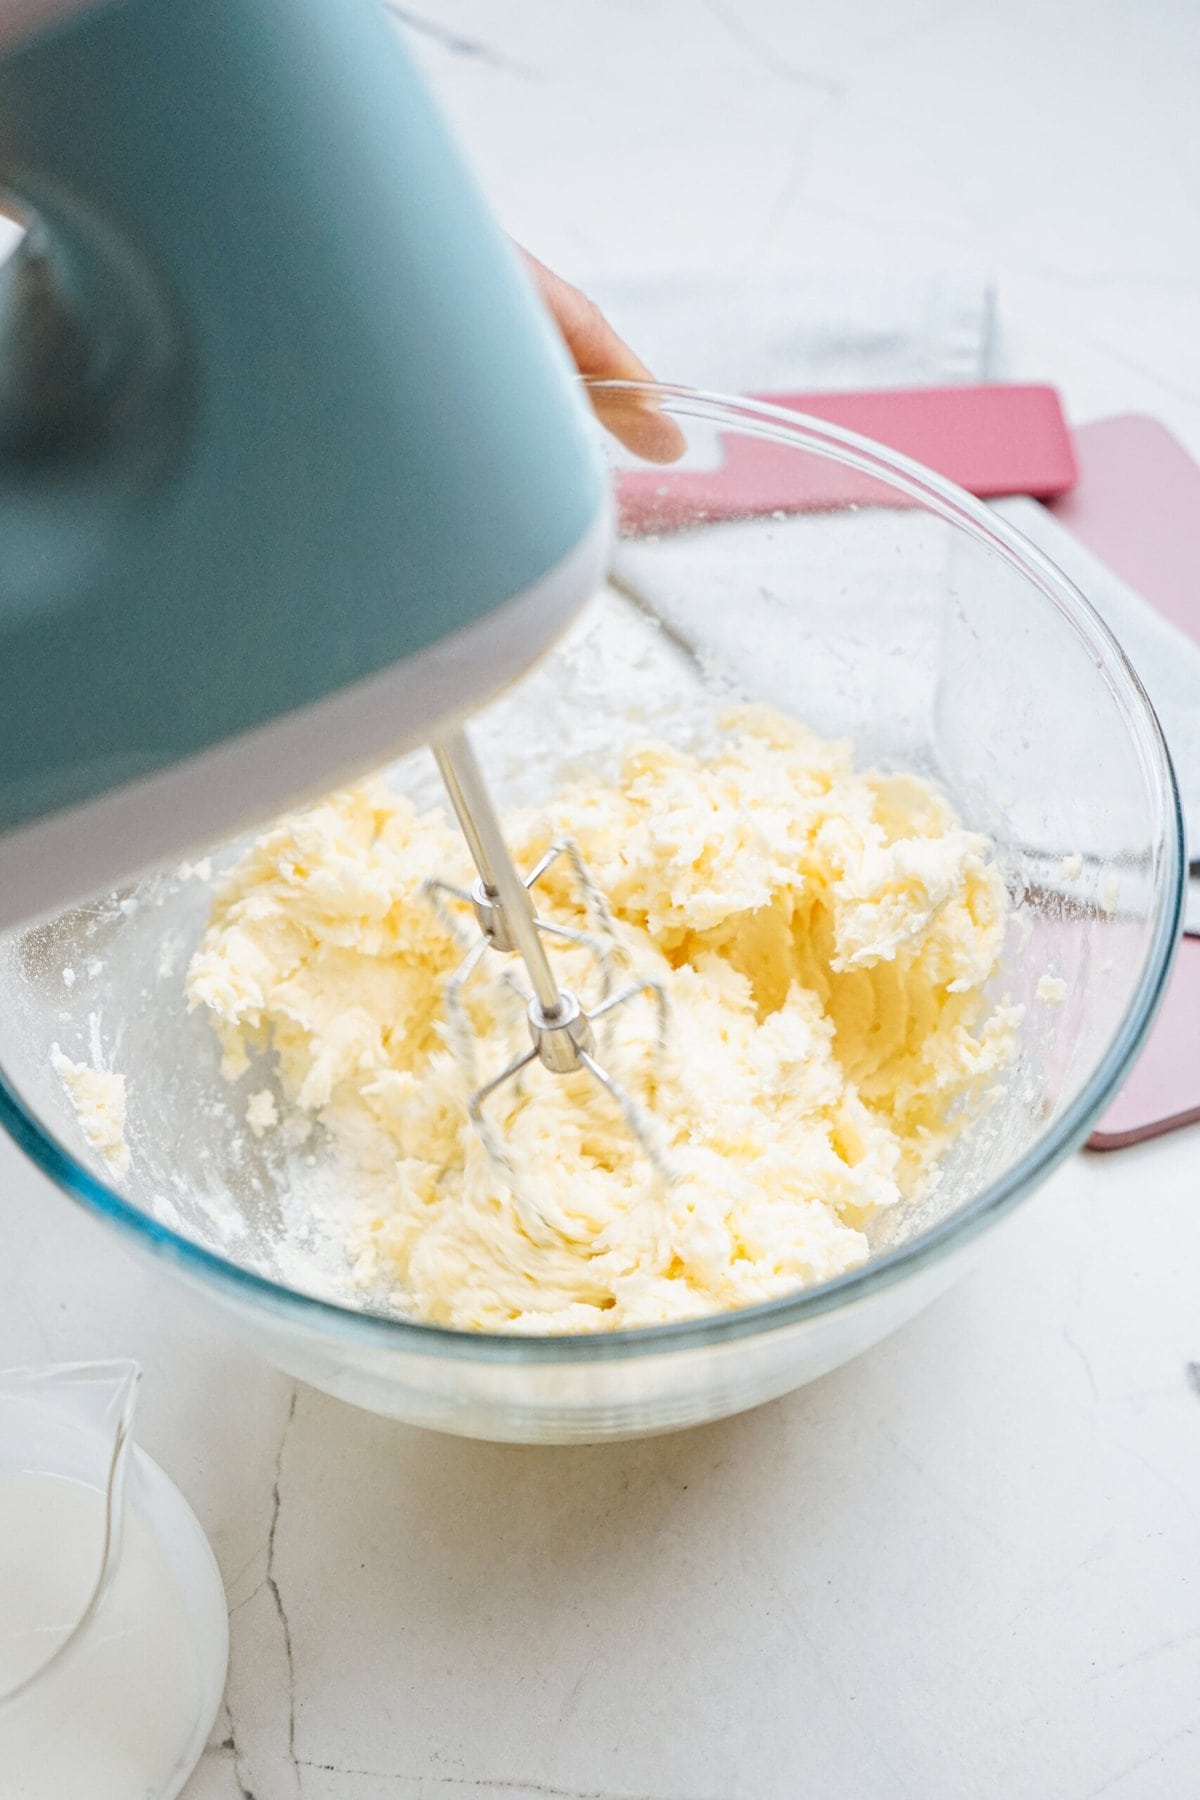
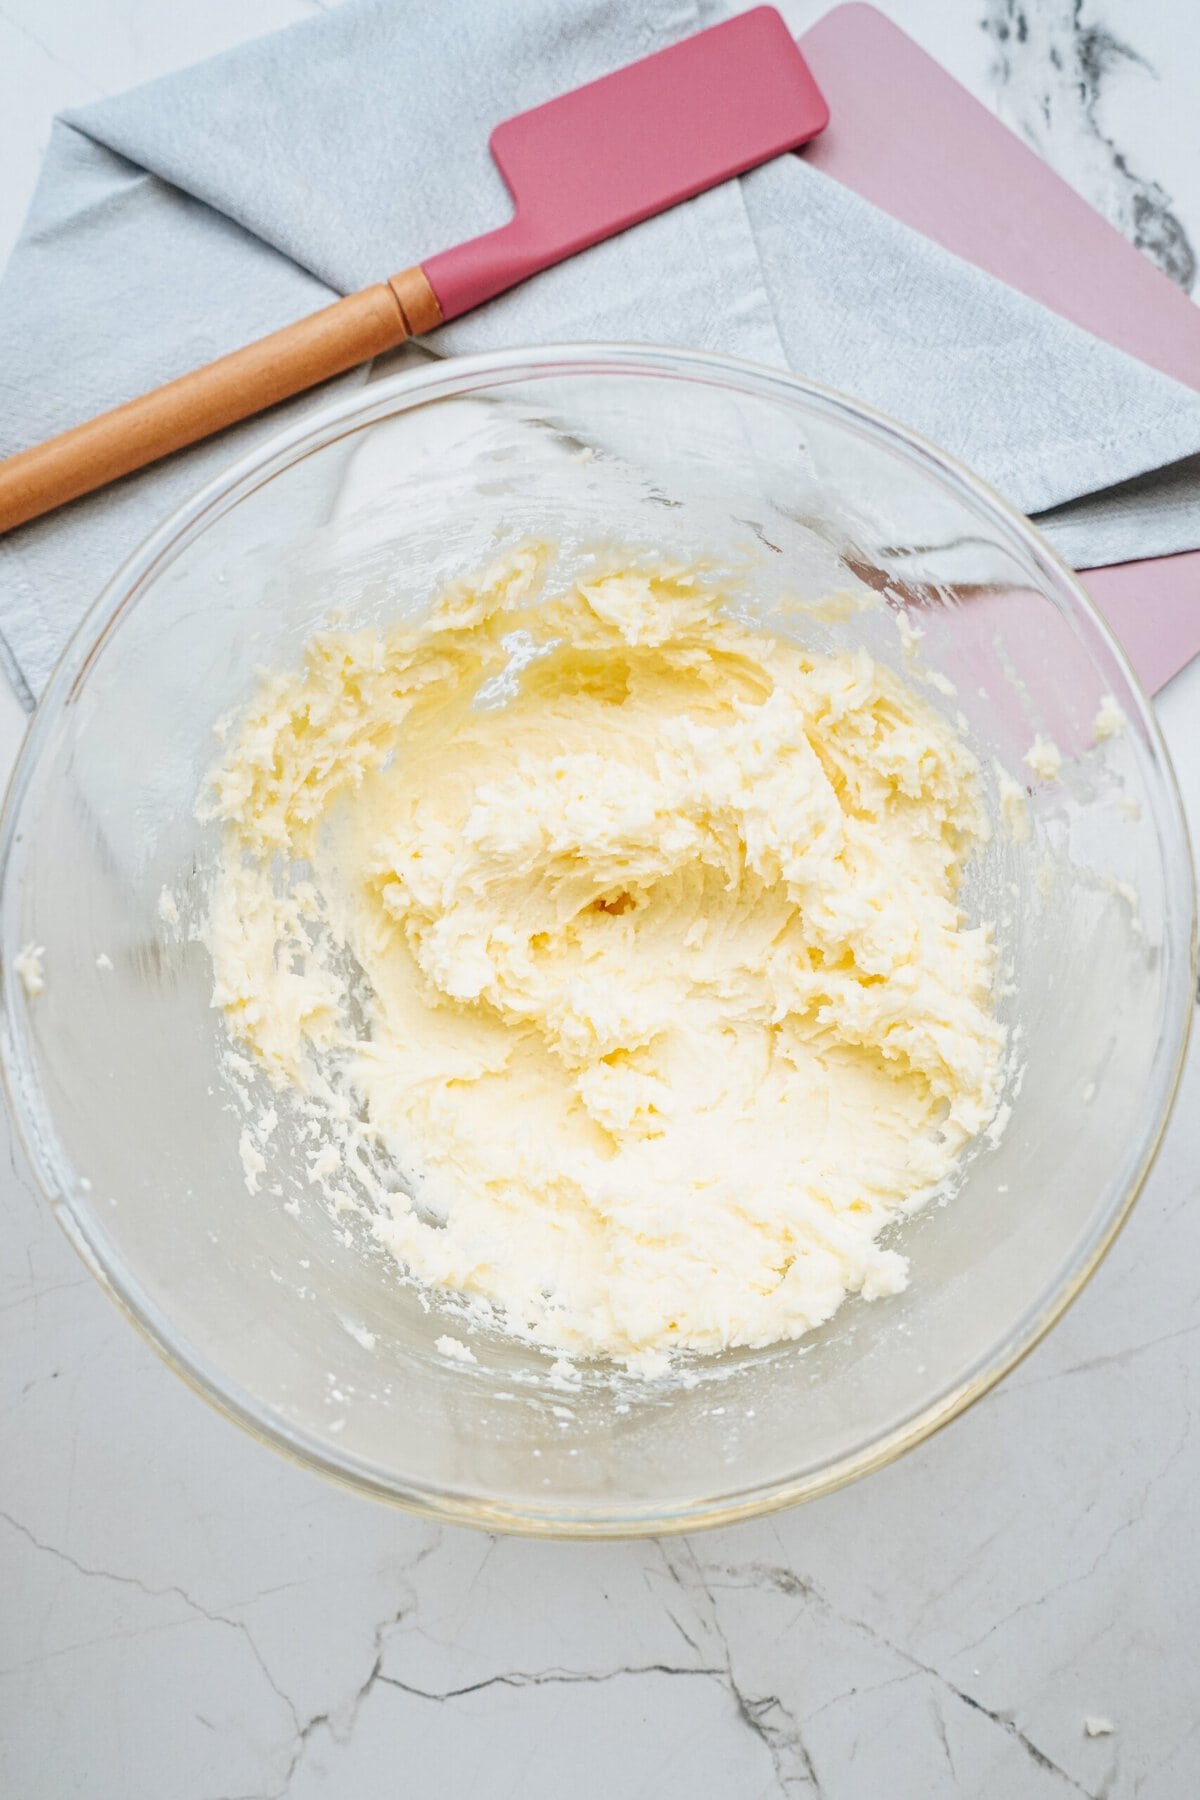
3. Make the Frosting (if the use of selfmade)
Whilst the cake is baking, make the frosting (if the use of selfmade). I used my Vanilla Buttercream Frosting, however be happy to make use of some other frosting recipe and even store-bought is fine- no judgement right here! Permit baked cake to chill utterly to room temperature.
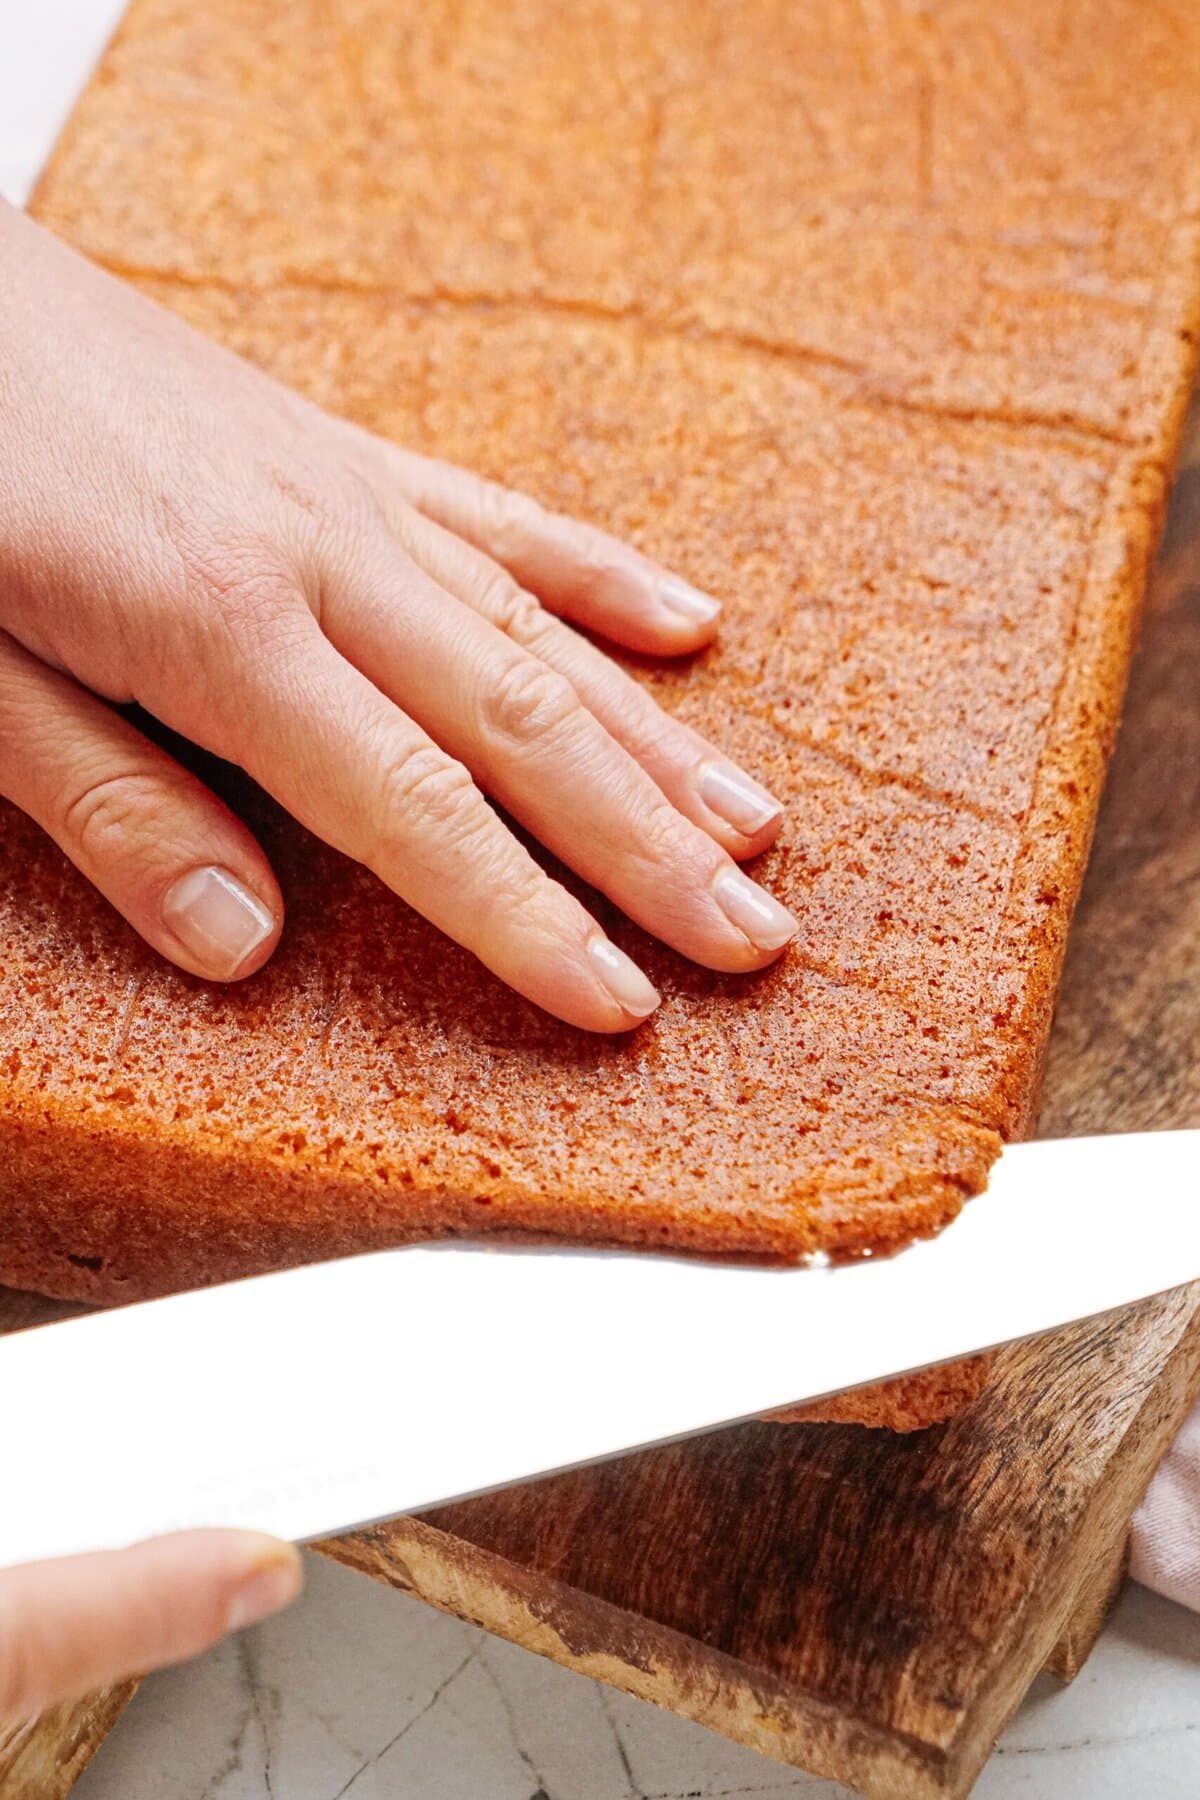
4. Take away Cooled Cake From Pan
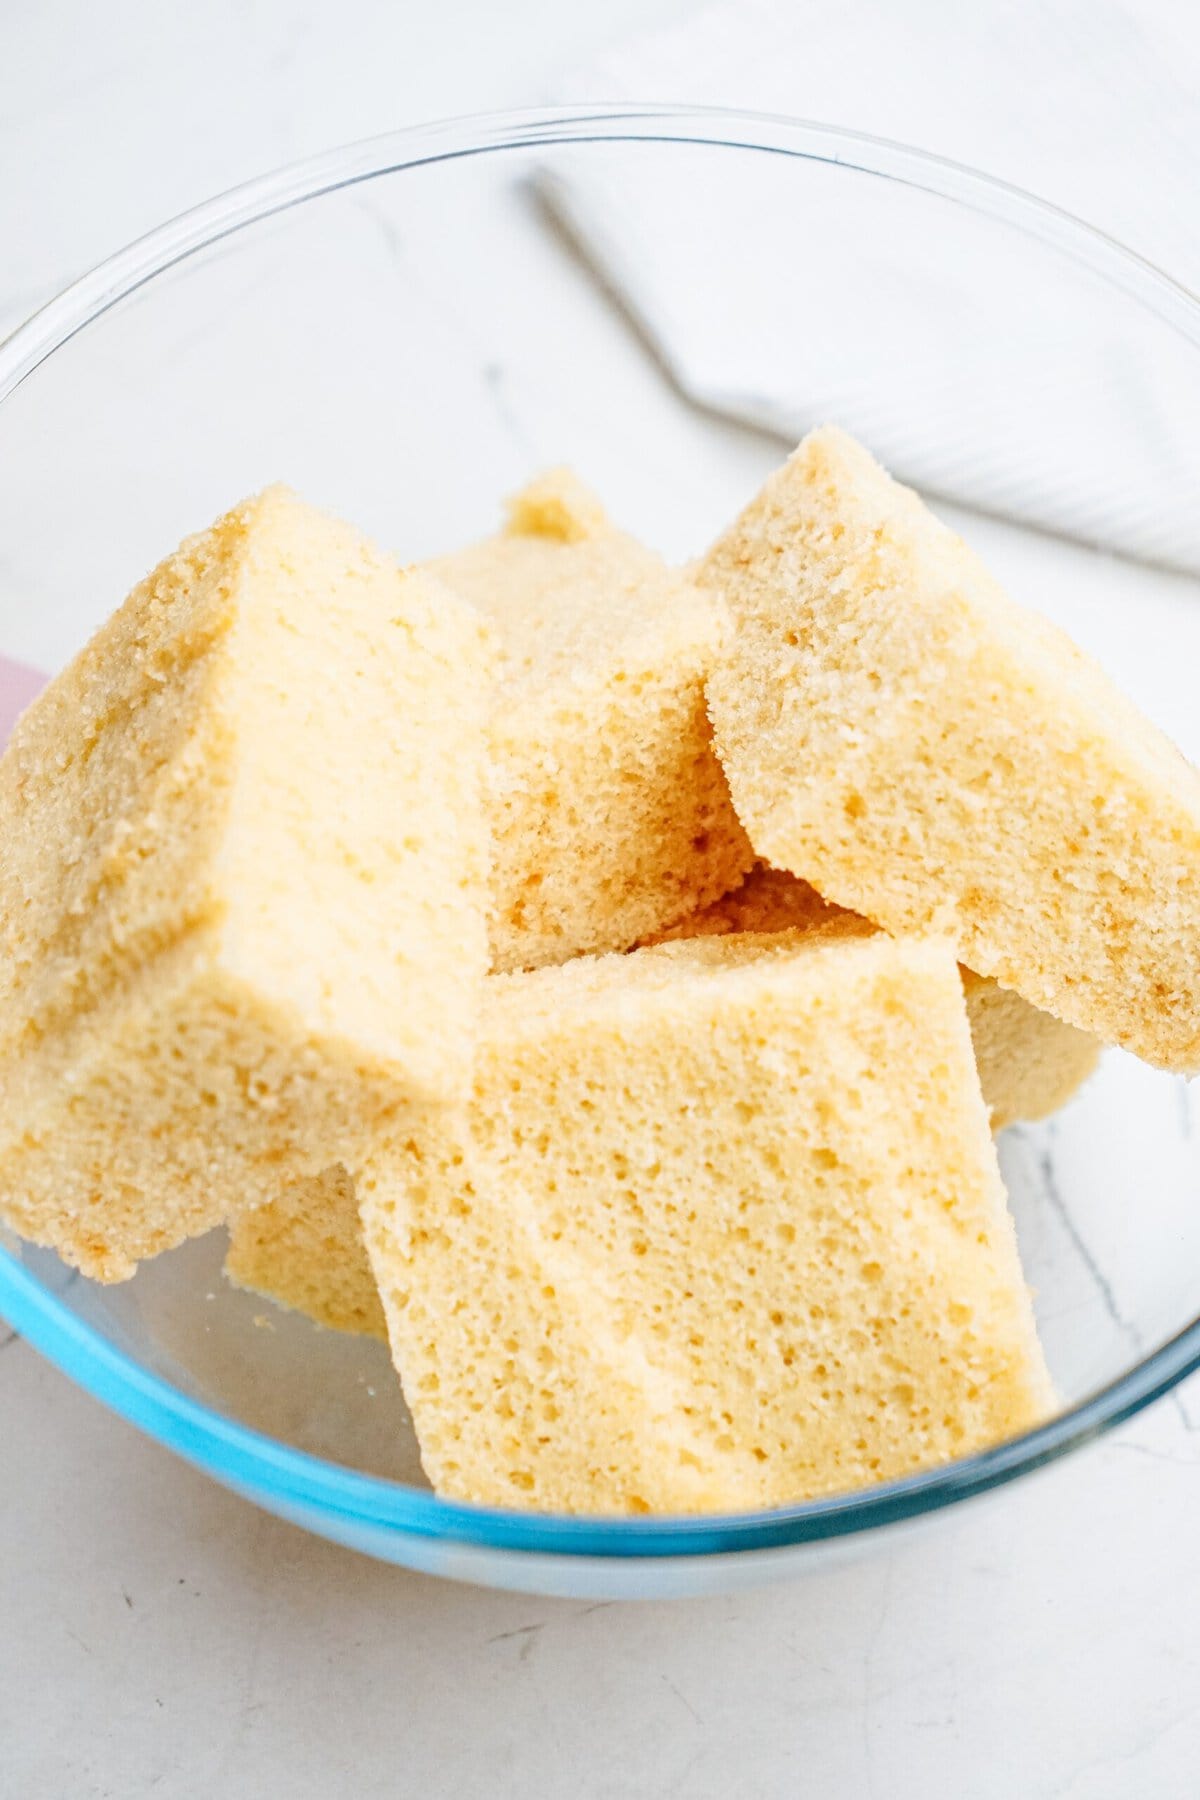
Take away cooled cake from the pans and the use of a big sharp knife, take away the darkish outer hardened layer of the cake. Discard or save for snacking. That is an non-compulsory step however I feel it makes for a greater ball-rolling enjoy if the onerous outer edges are got rid of.
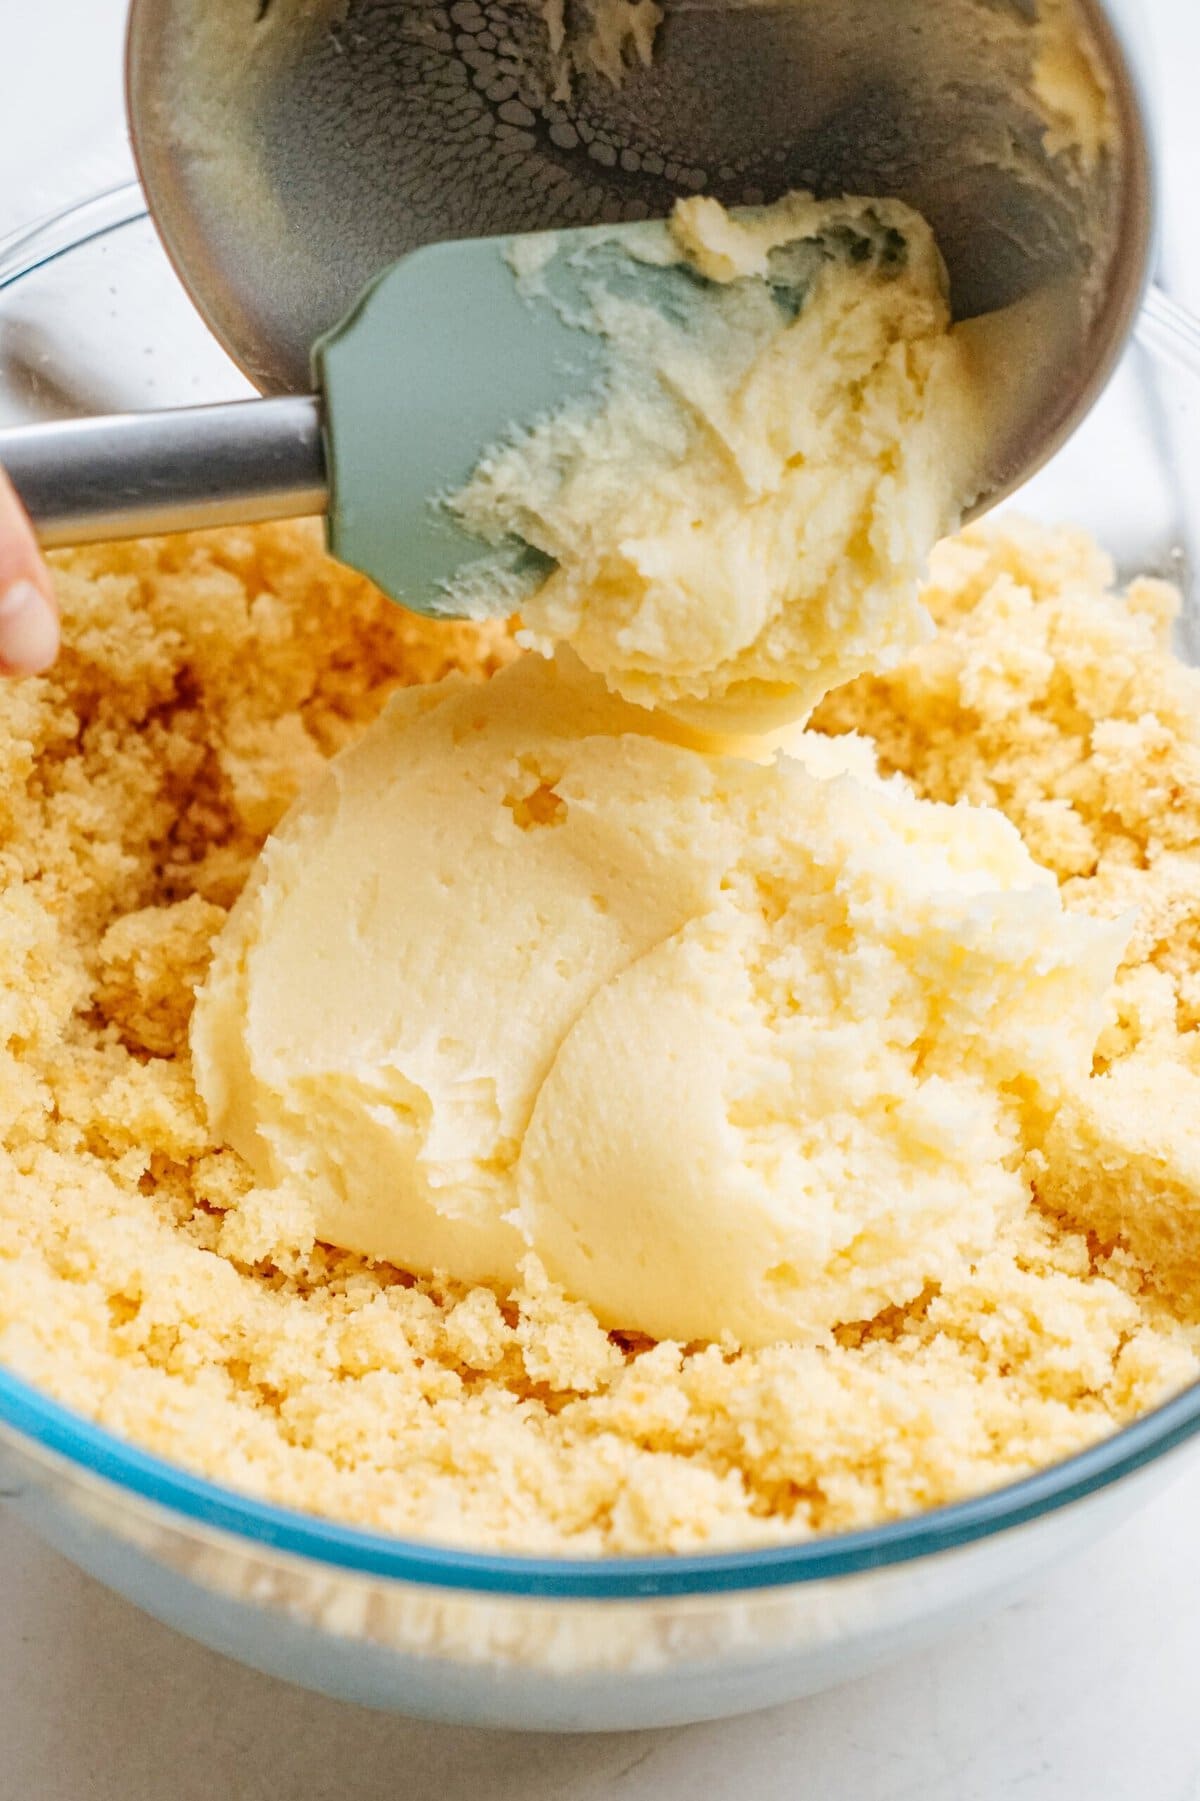
5. Mix Cake + Frosting
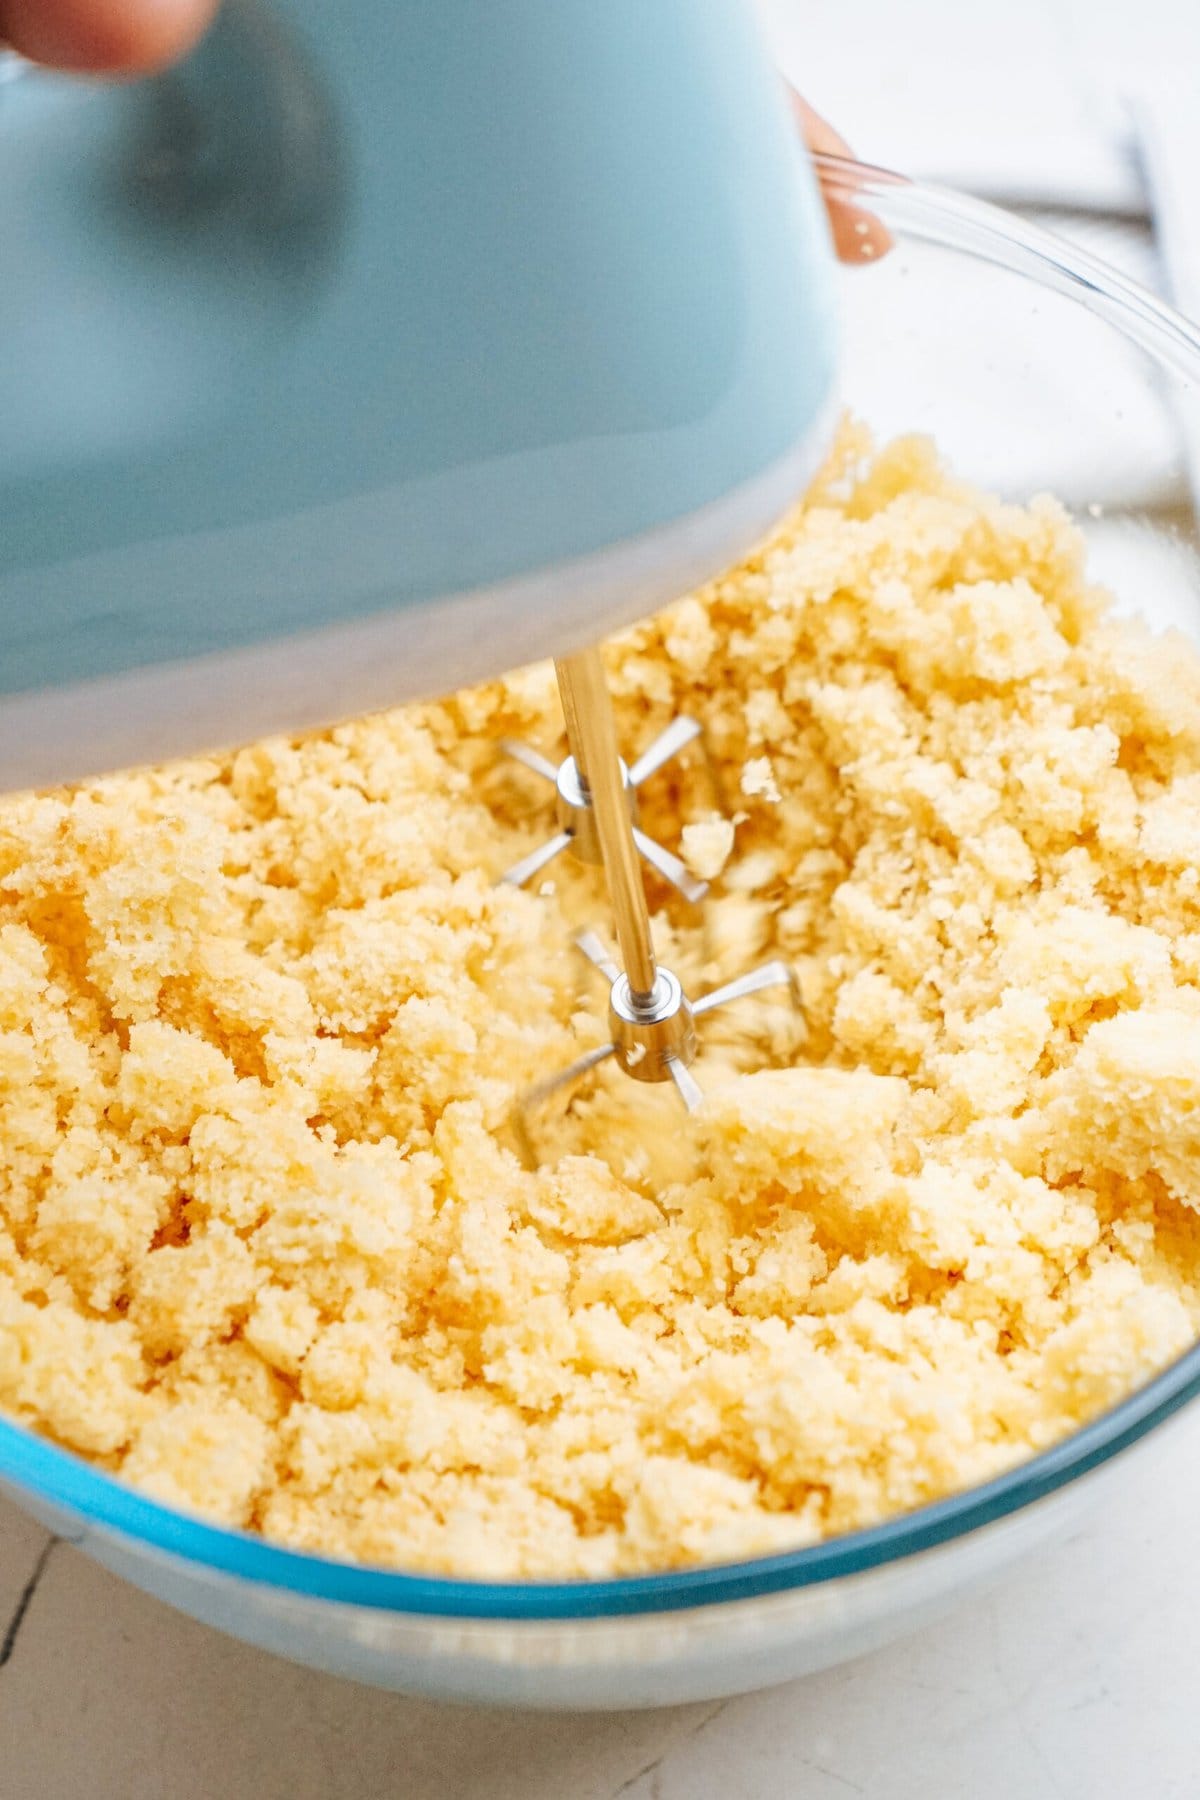
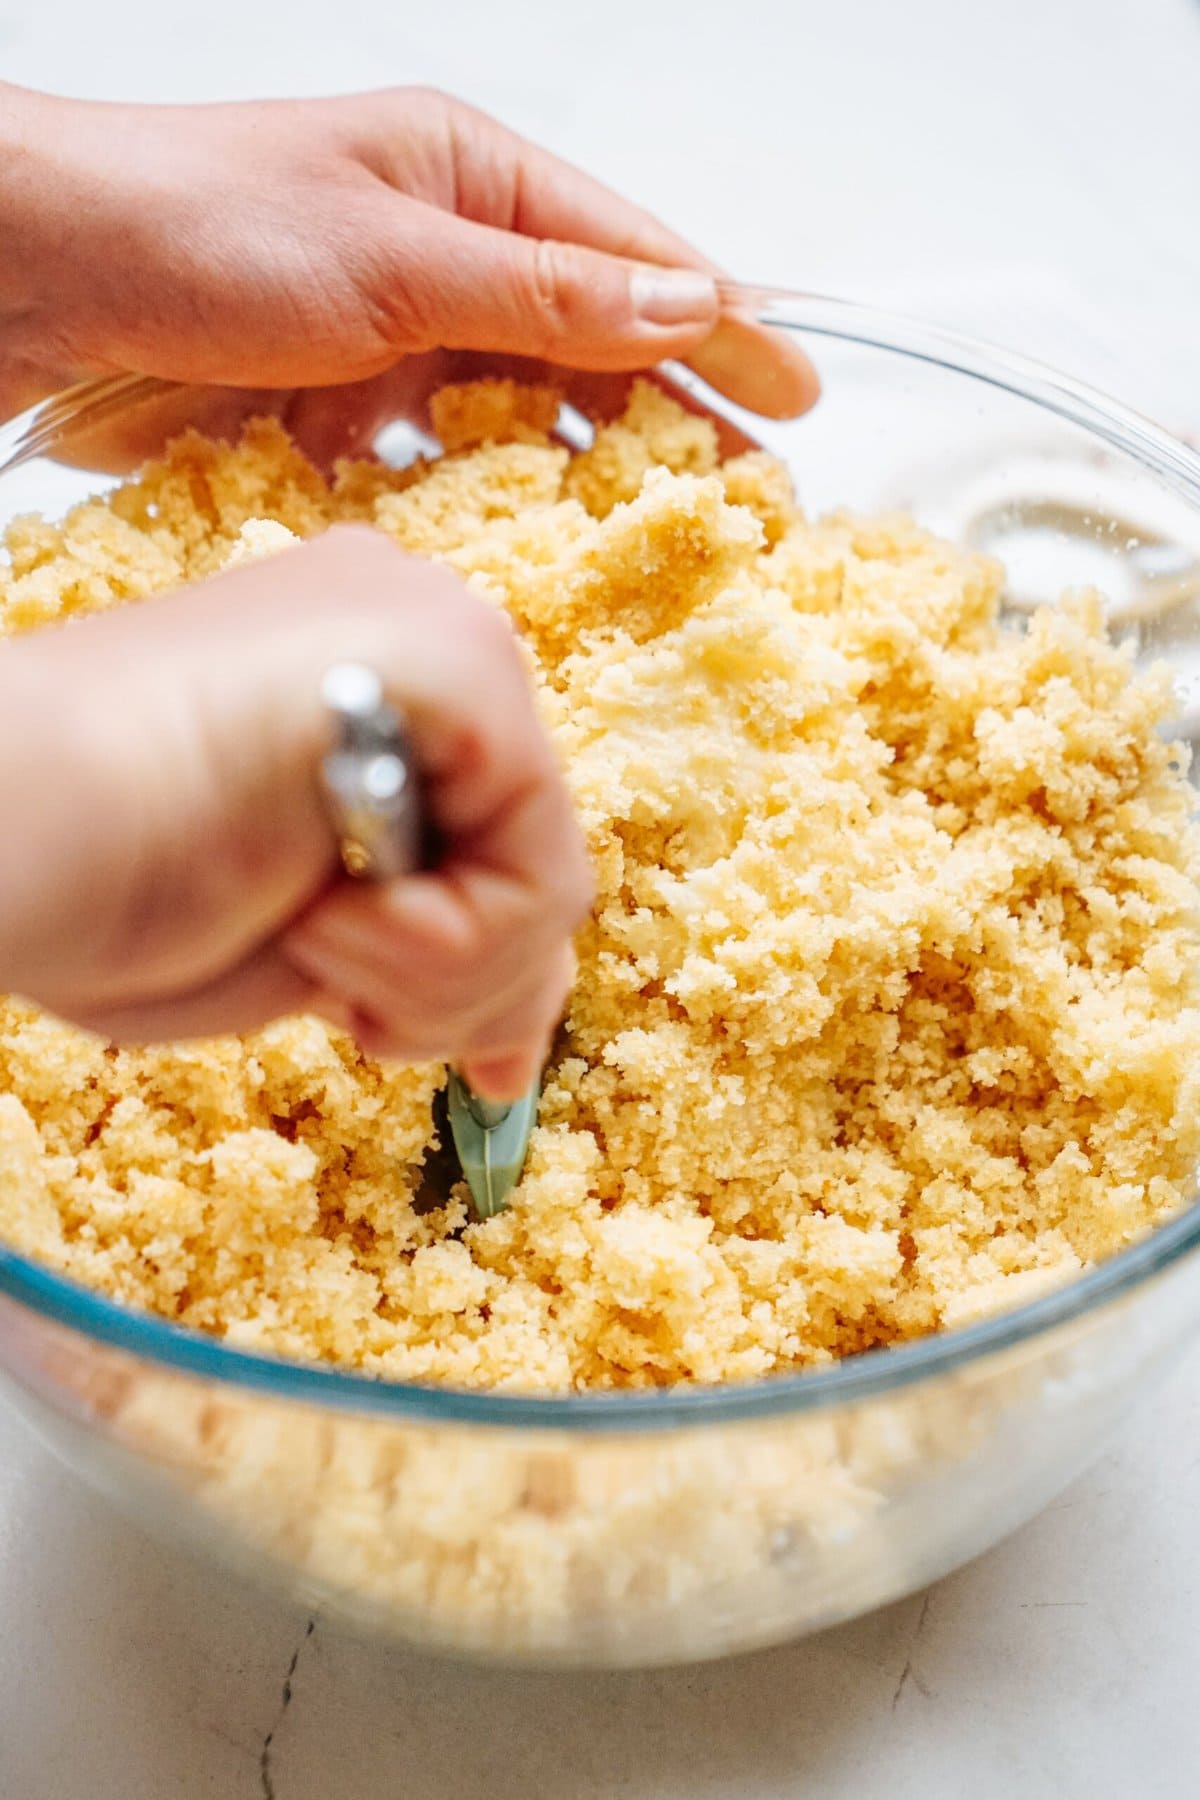
The use of a stand mixer with the paddle attachment (or hand mixer), position reduce up cake items into the bowl. With the mixer on low velocity, disintegrate the cake to create wonderful crumbs. Subsequent, combine 1 cup of vanilla frosting to the cake crumbs. Combine on medium velocity. The mix will have to be wet and stick in combination simply. If the dough is simply too dry, upload in additional frosting a tablespoon at a time.
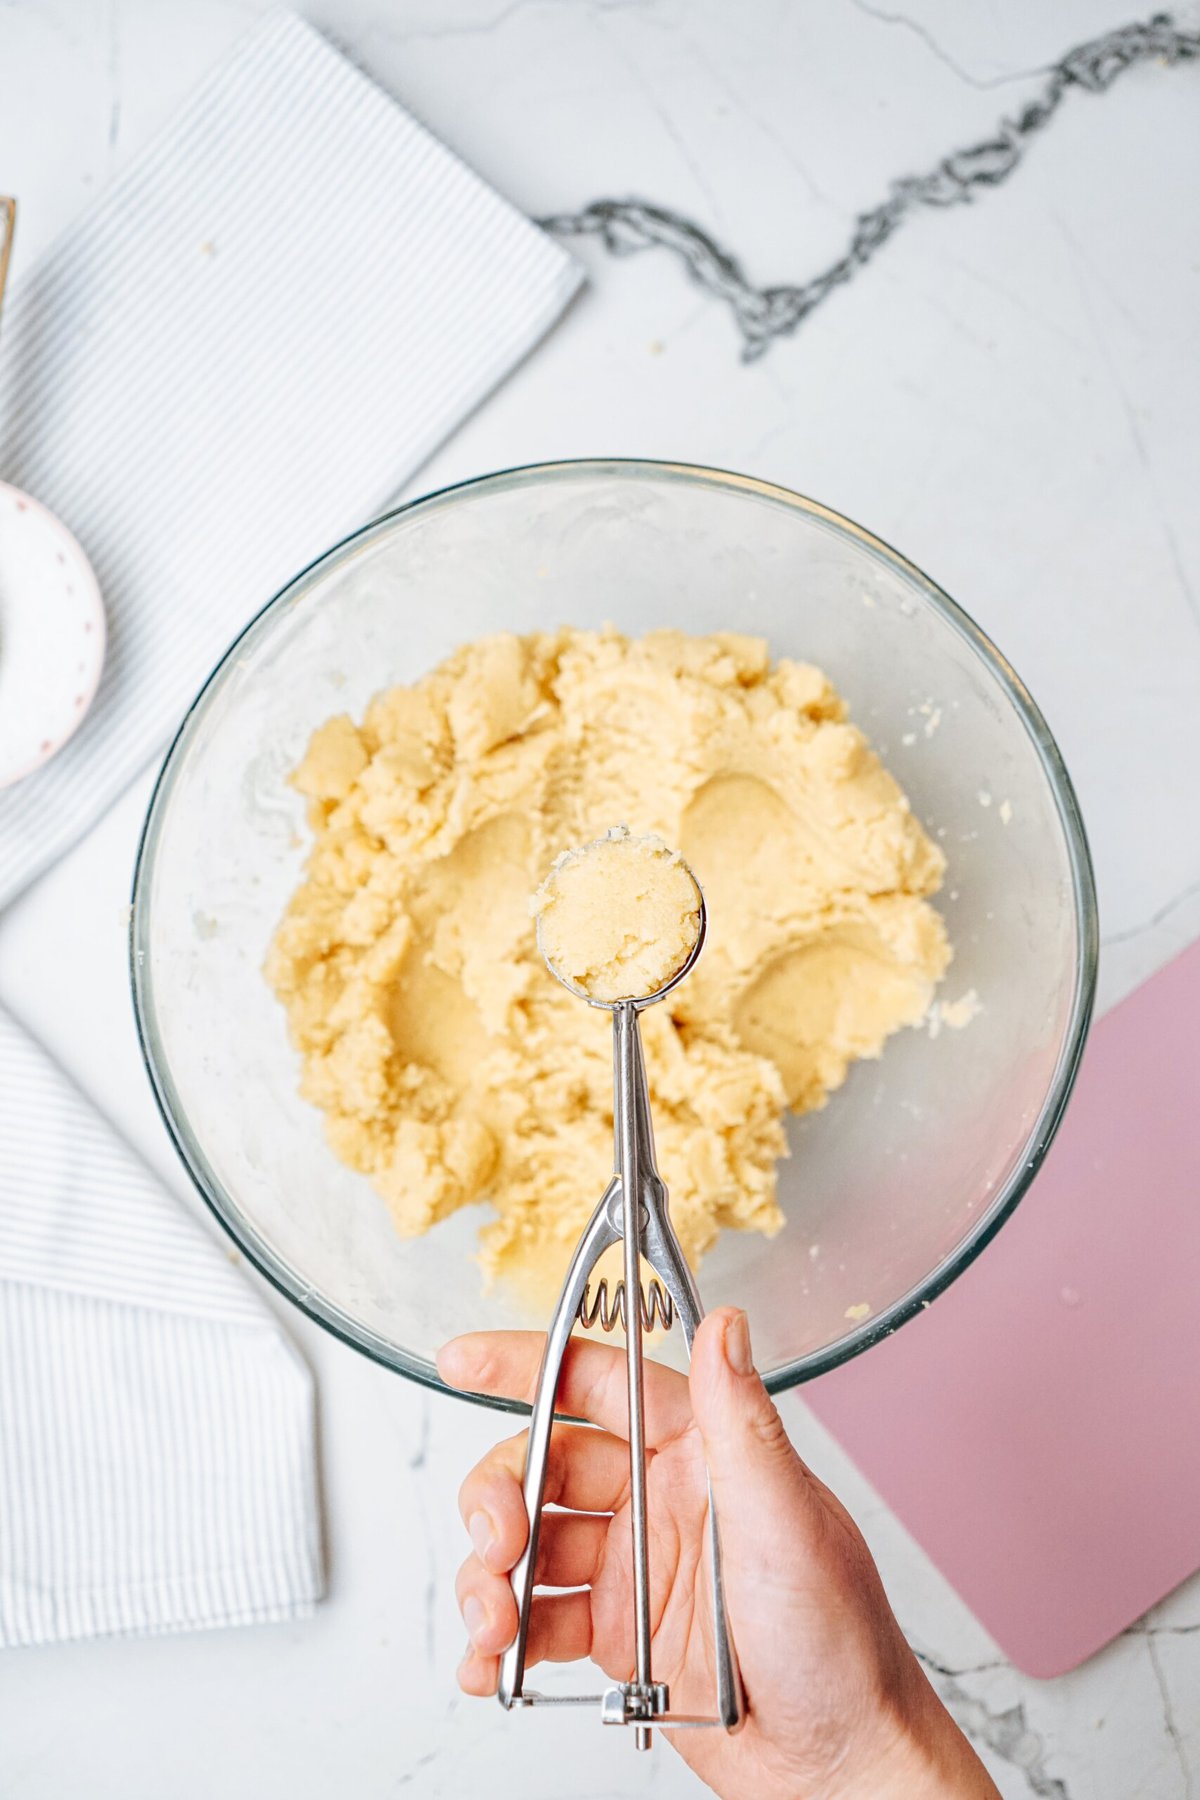
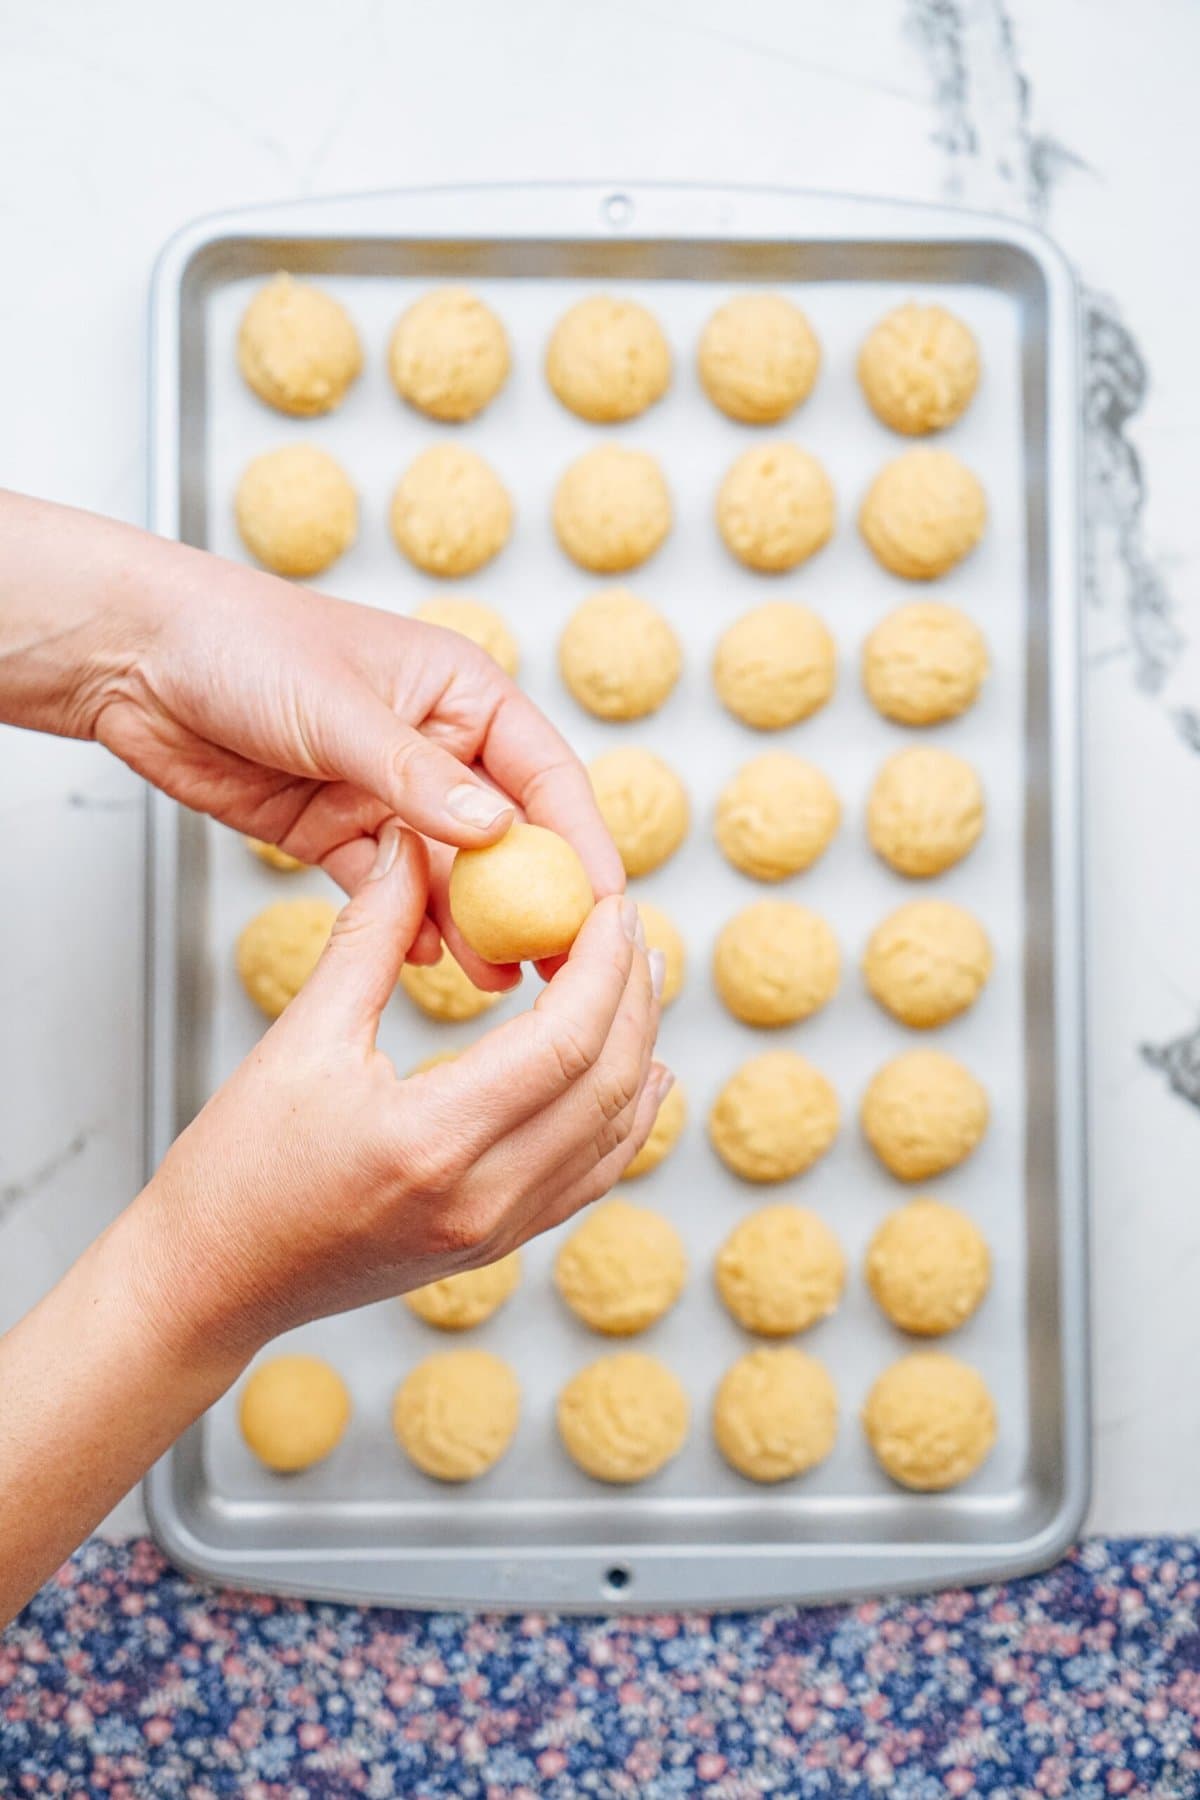
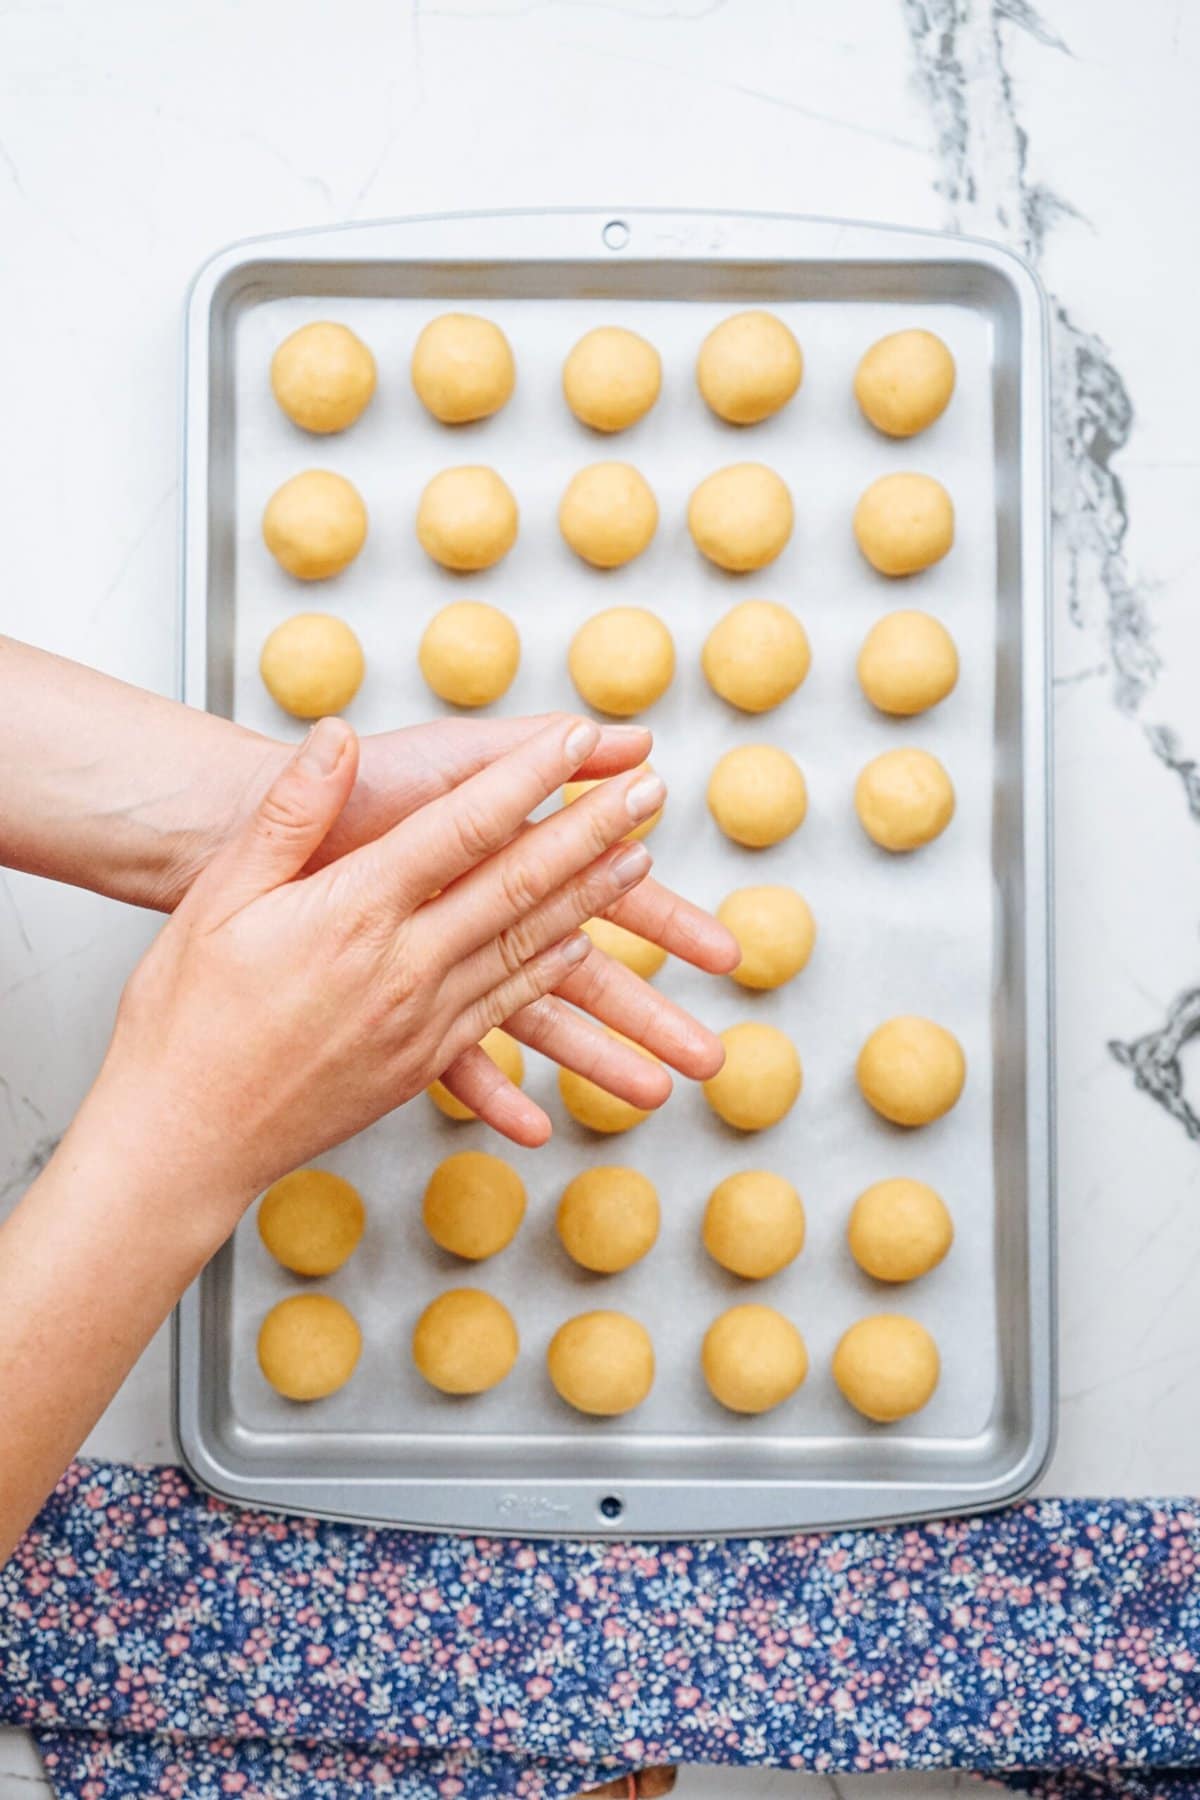
6. Shape Cake Balls The use of a Cookie Scoop
You’ll desire a sheet pan or cookie sheet to put the entire cake balls on and switch to the freezer. Line the baking sheet with a work of parchment paper. Put aside. The use of a cookie scoop, scoop cake balls onto the sheet. Roll every ball in a round movement within the palm of your hand. If the dough sticks on your palms, you’ll want to wash them from time to time.
7. Duvet + Freeze + Roll Once more
Duvet with plastic wrap and freeze cake balls for approximately half-hour. Take away from freezer and provides every ball a moment roll with the palm of your palms. This may make certain an flippantly spherical ball. Duvet and position again into freezer for 1 hour.

8. Soften Chocolate Wafers
Professional Tip: Paintings in small batches! Pour ⅓ of the bag of chocolate within the bowl after which as soon as it’s used up, soften some other ⅓ of the bag, and so forth.
Proper earlier than you’re in a position to tug out your cake pops, soften chocolate. Microwave chocolate wafers in a microwave-safe bowl or cup (ideally a tall one who you’ll be able to simply dip the cake pop in). Get started out with 30 seconds, stir, after which soften at 20-second increments till melted. Watch out to not overcook the chocolate or it’ll snatch up!
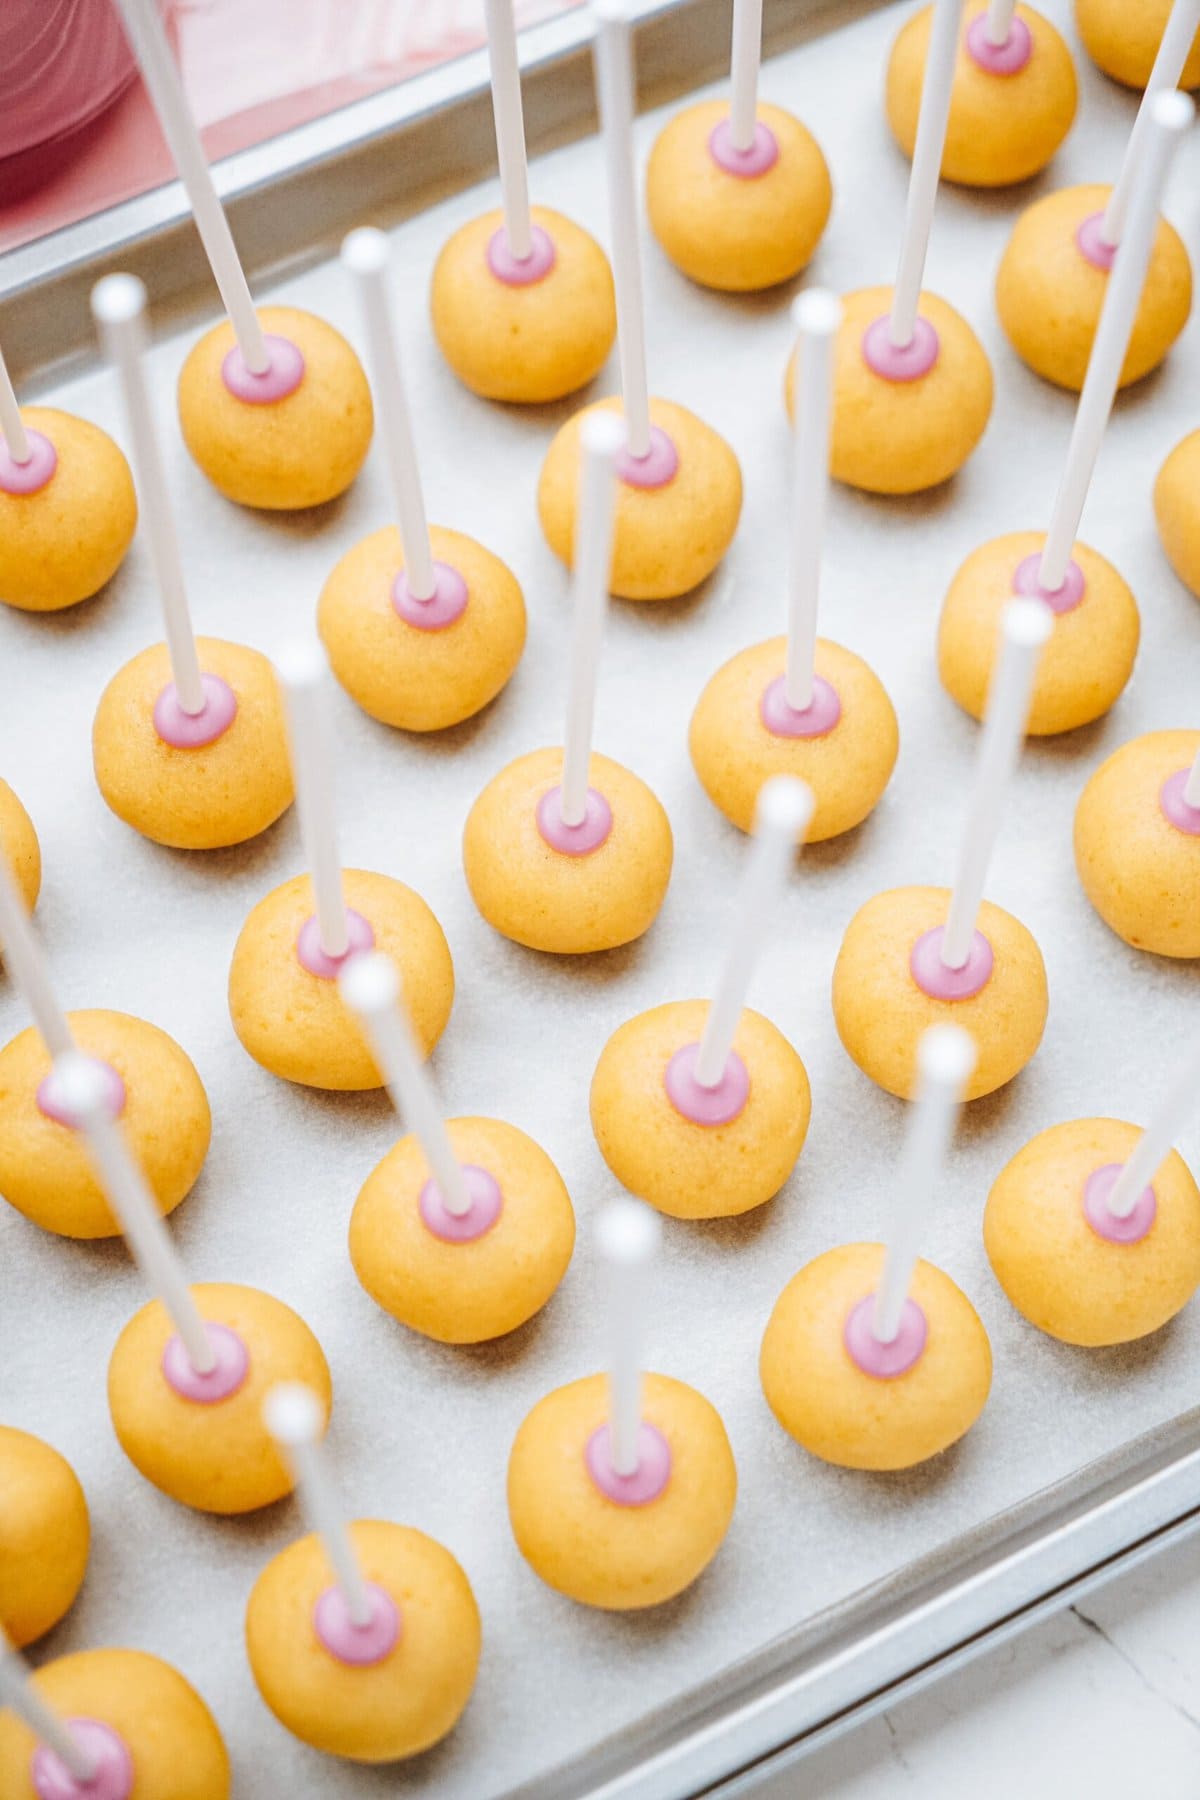
9. Insert Cake Pop Sticks into Cake Balls
Take away cake pops from the freezer. Dip the top of a cake pop stick into the melted chocolate and slide about two thirds the way in which thru a cake pop ball. The chocolate will act as a glue for the stick. Do that with all 40 cake pop sticks, hanging every one again on baking sheet as you cross.
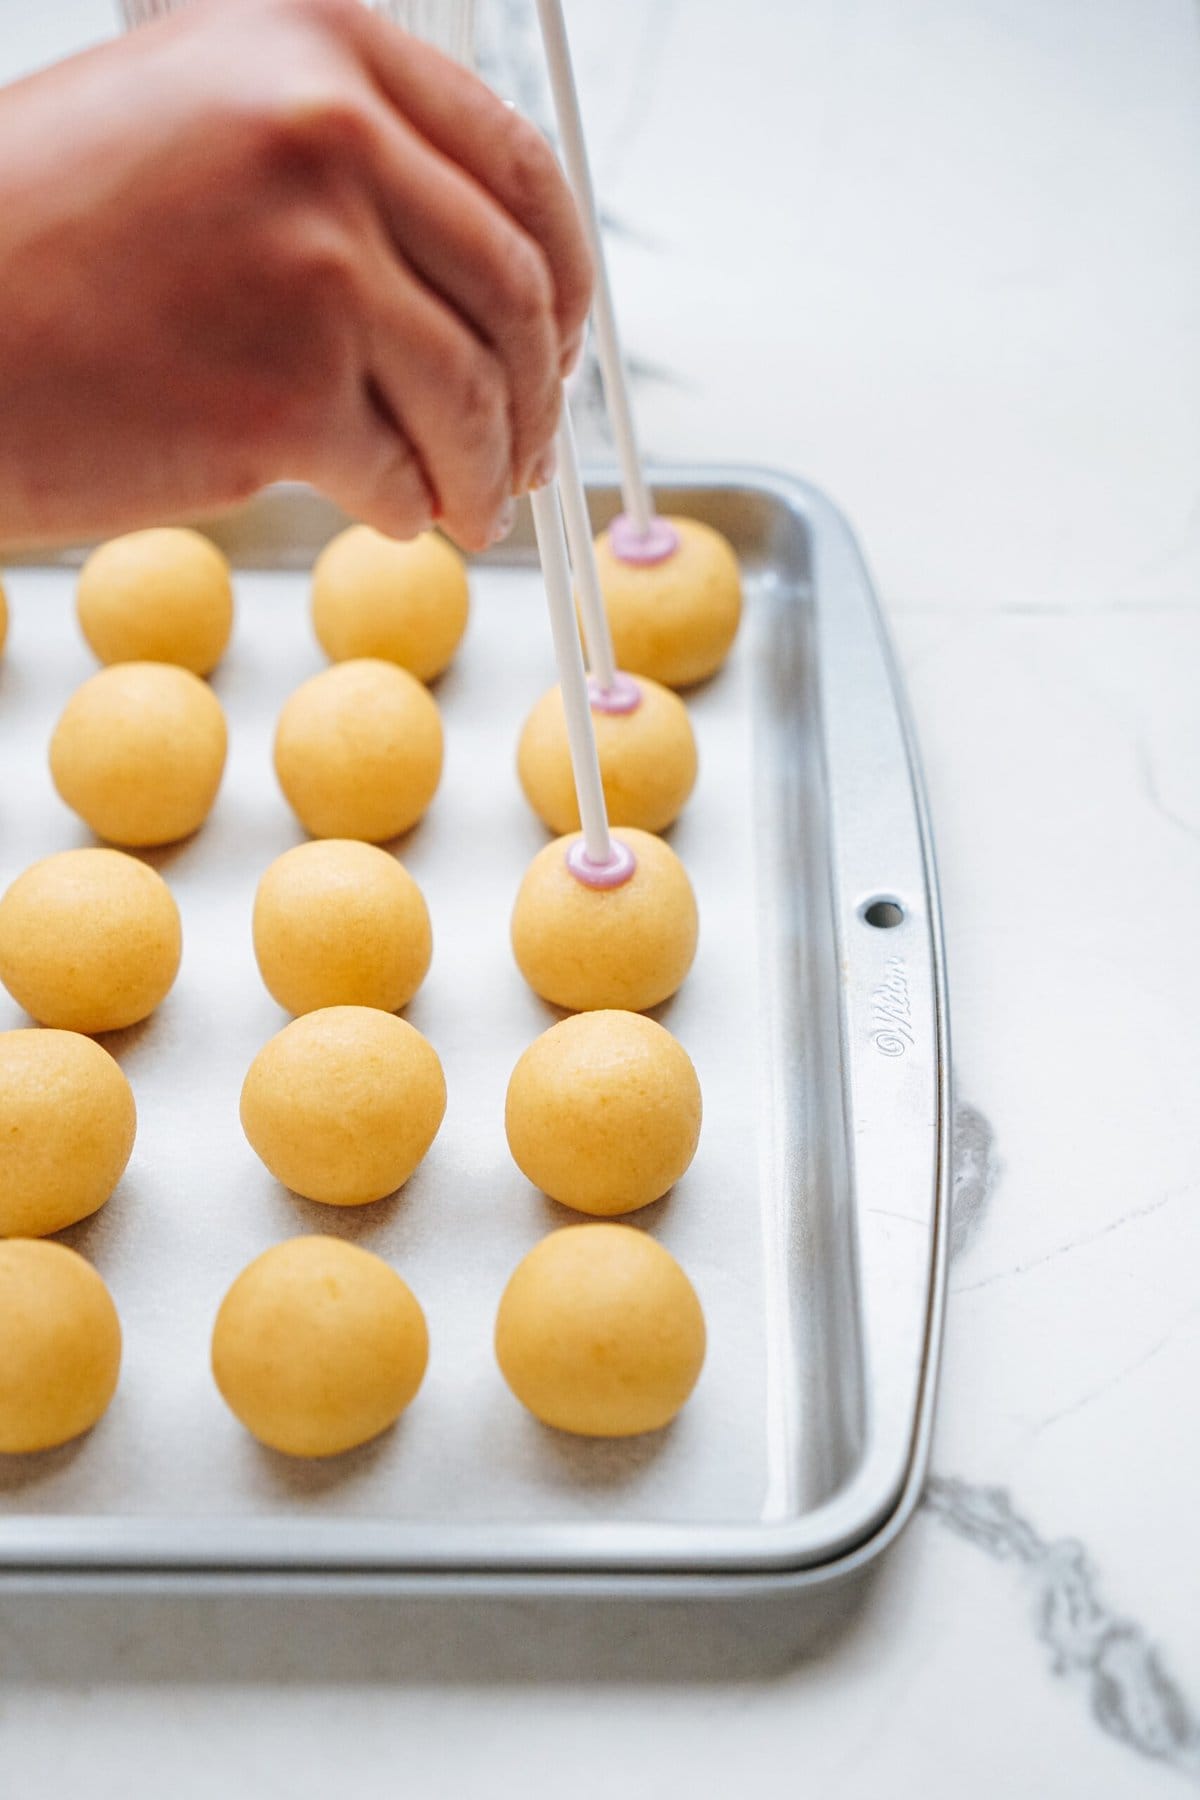
Professional Tip: If this step is taking you a very long time to do, you could imagine re-freezing your cake pops for quarter-hour or so and re-melting the chocolate. It is a normal rule right through this whole procedure.
10. Time to Dip Cake Pops!
Now you’re in a position to dip! Maintaining the cake pop via the ground of the stick, position the wrong way up into the cup of melted chocolate, turning a little bit to get each and every piece of the cake ball coated. Let as a lot extra chocolate drip off as conceivable, gently tapping at the facet of the cup to take away extra.
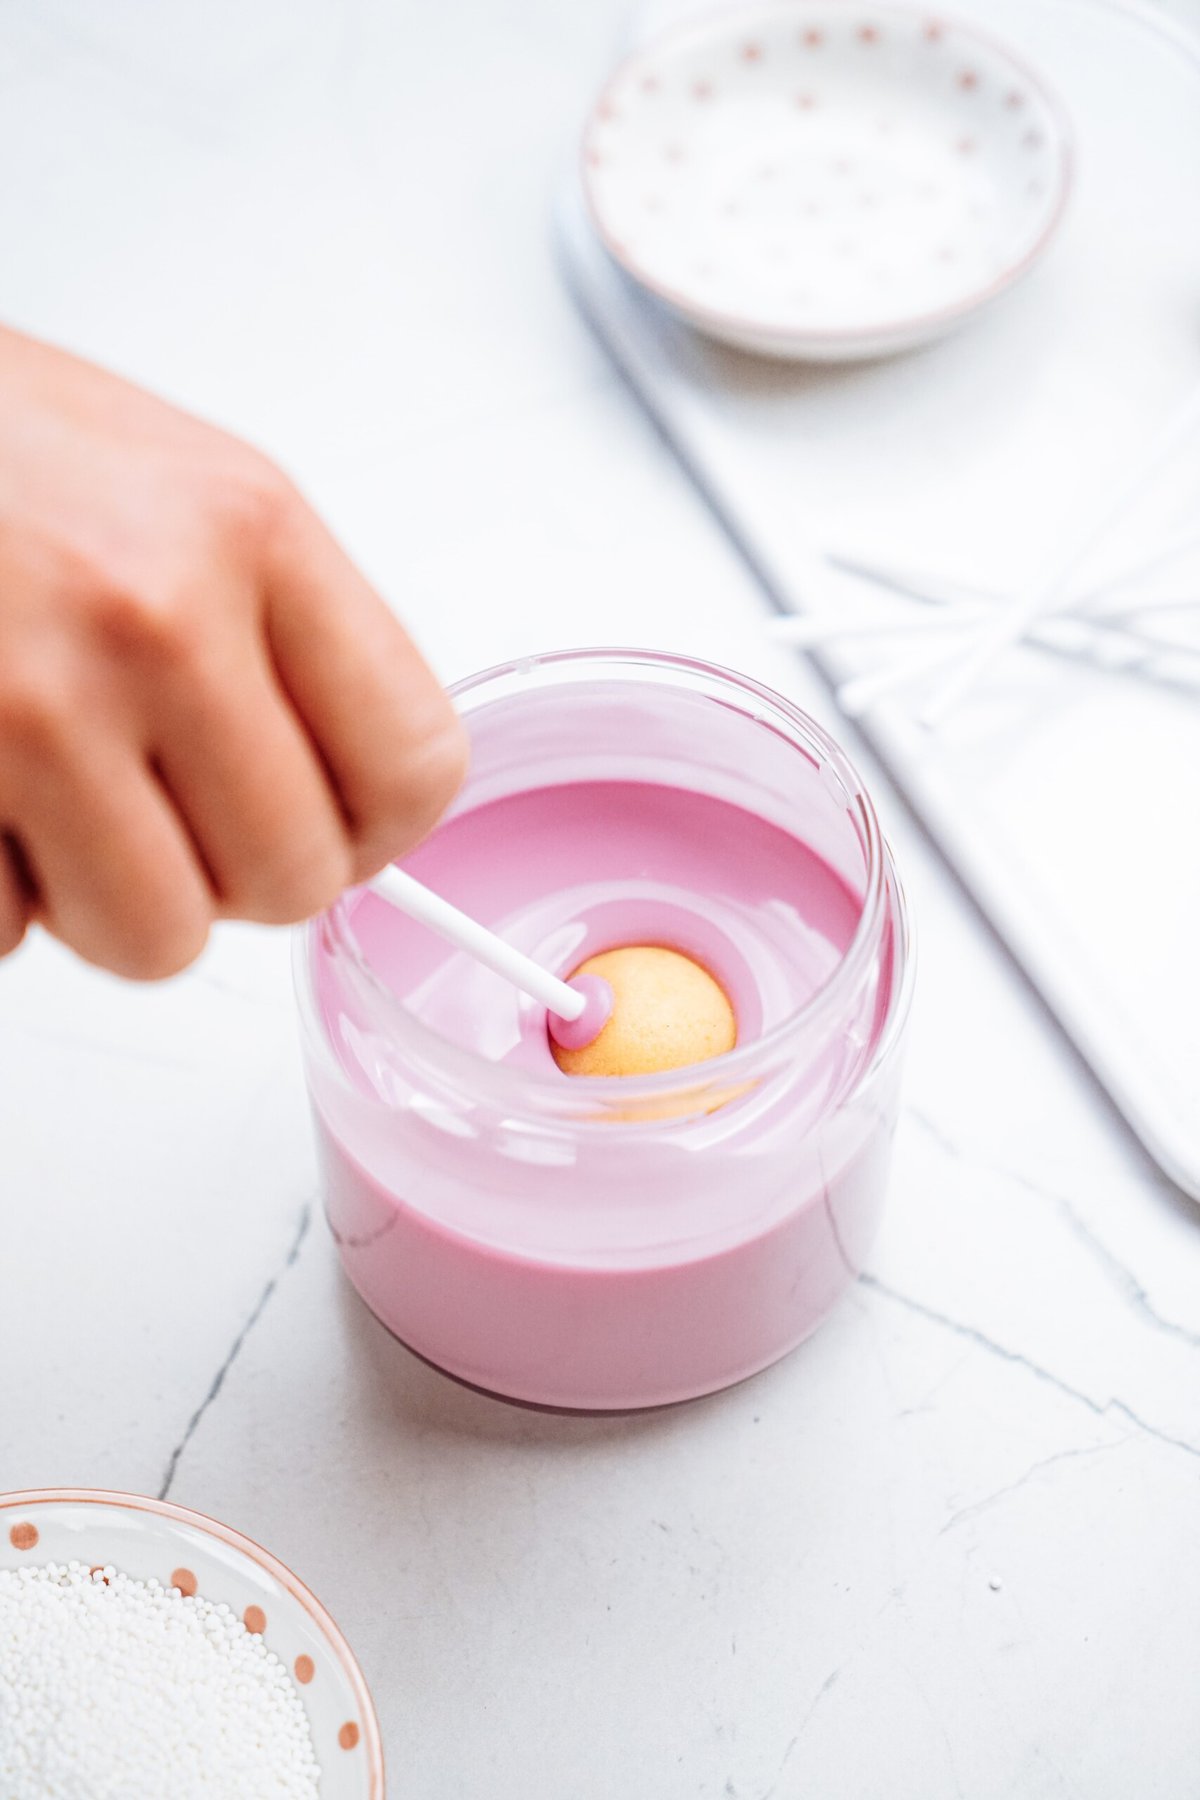
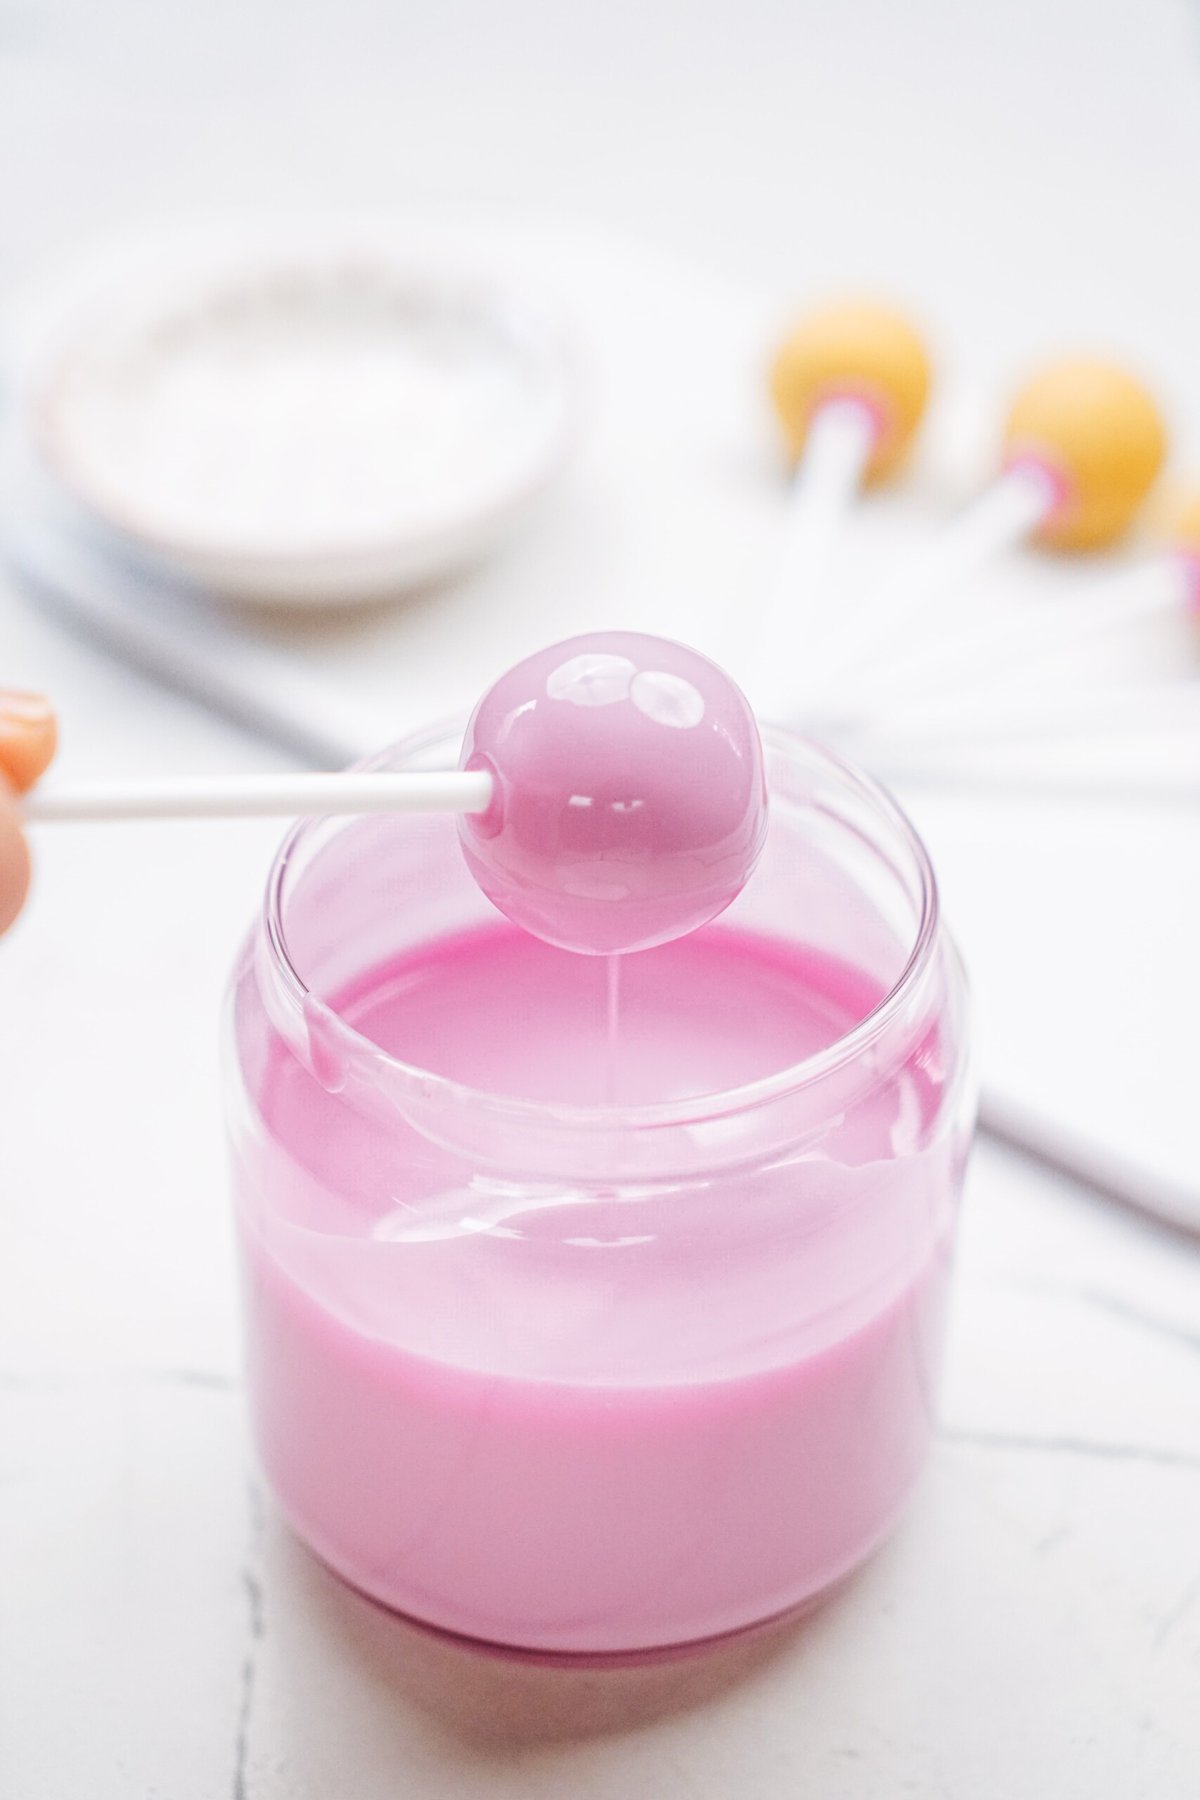
Professional Tip: If the chocolate is simply too thick, you’ll be able to upload a tiny quantity of coconut oil to skinny it out, simply watch out to not upload an excessive amount of for the reason that chocolate gained’t set! You’ll be able to additionally use Crisco shortening.
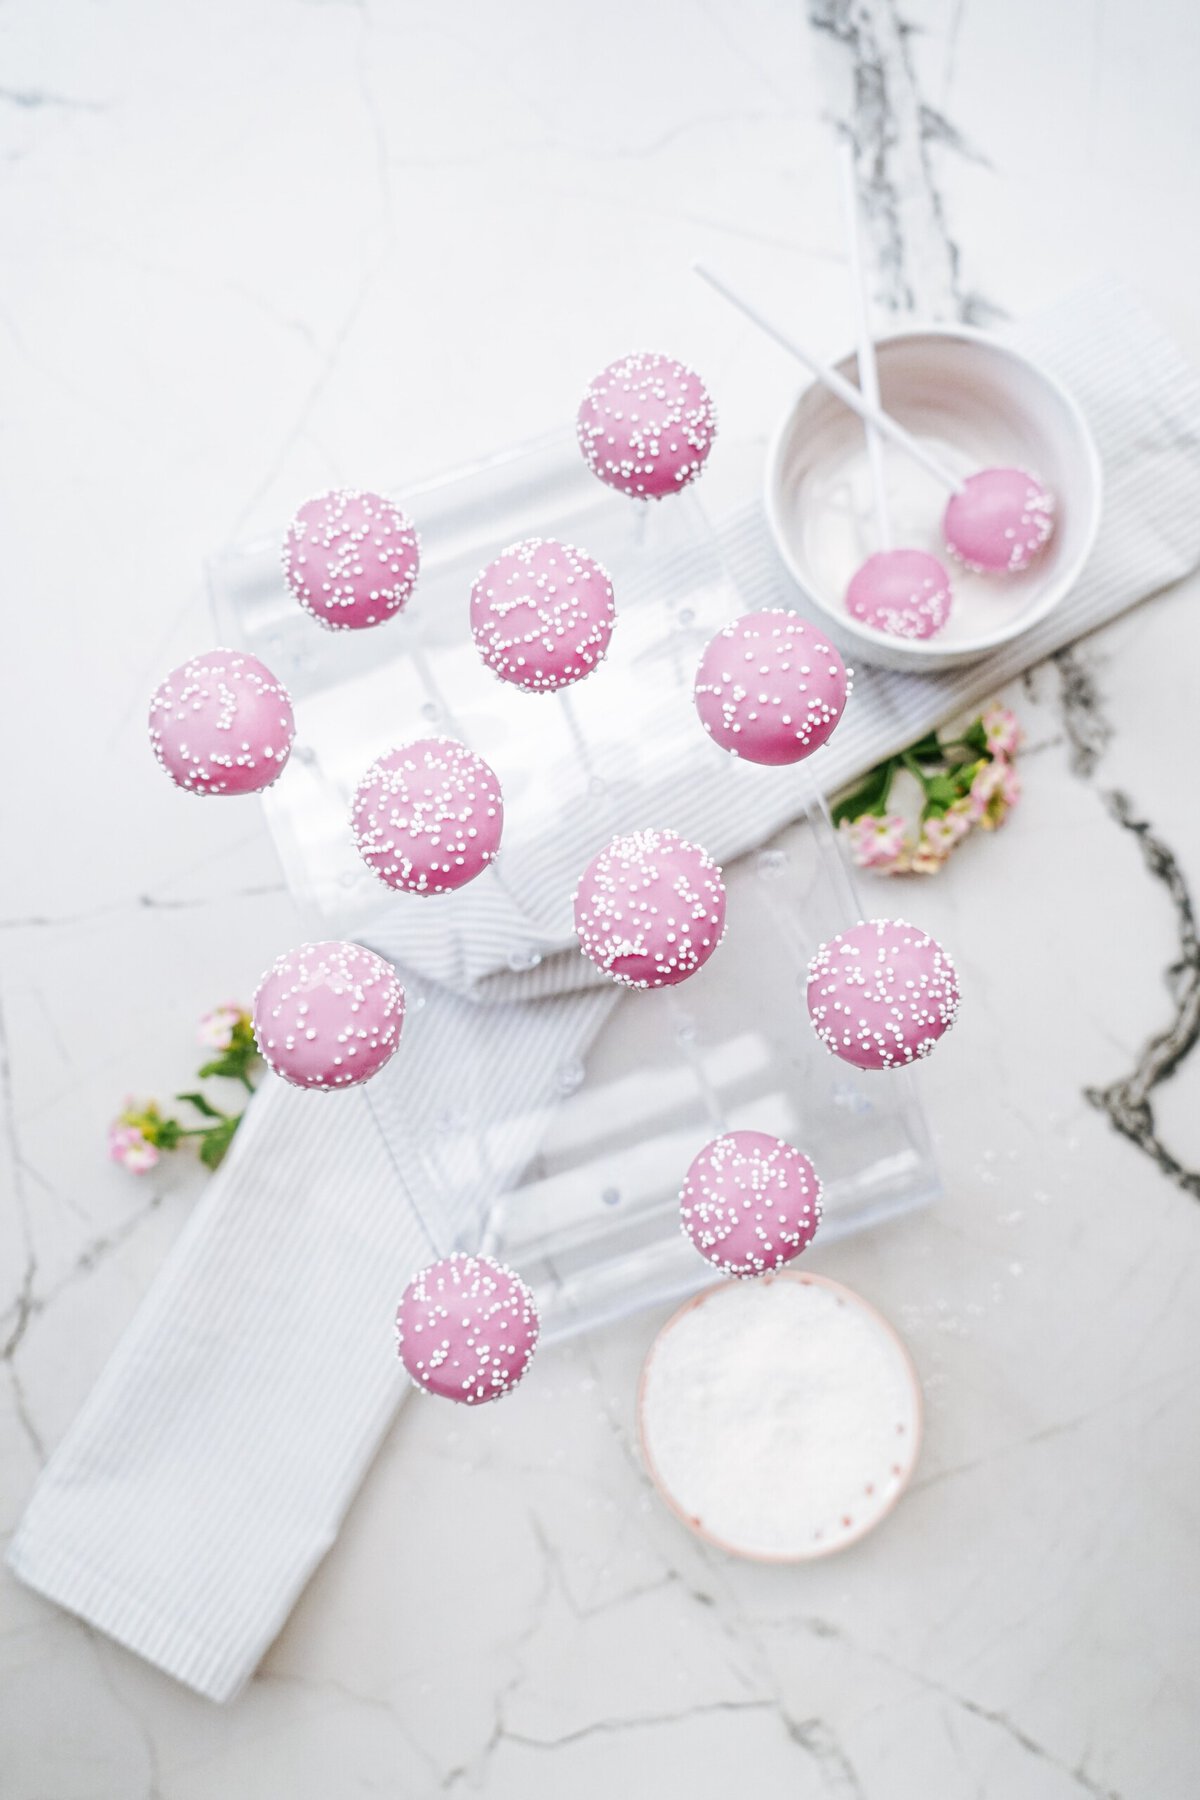
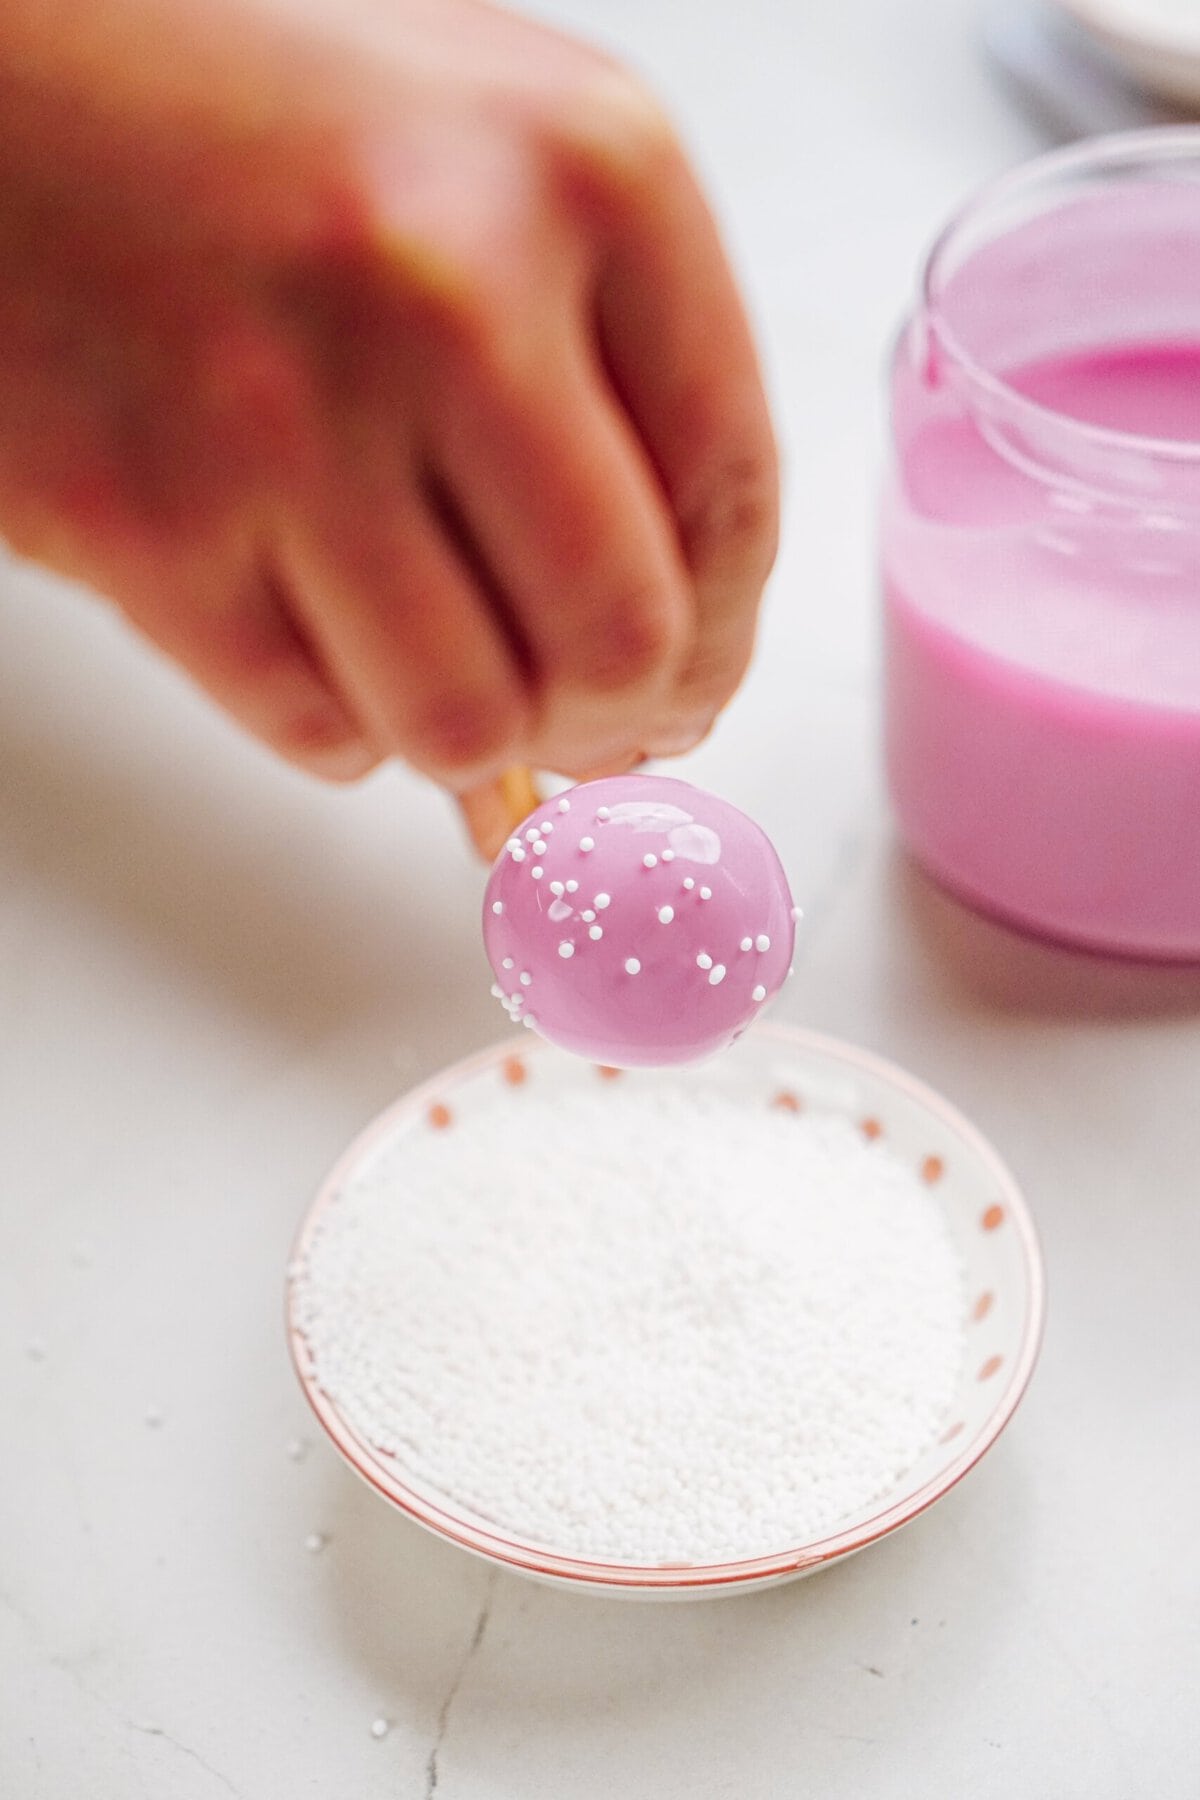
11. Enhance!
Shifting temporarily, enhance with white sprinkles earlier than the chocolate units.
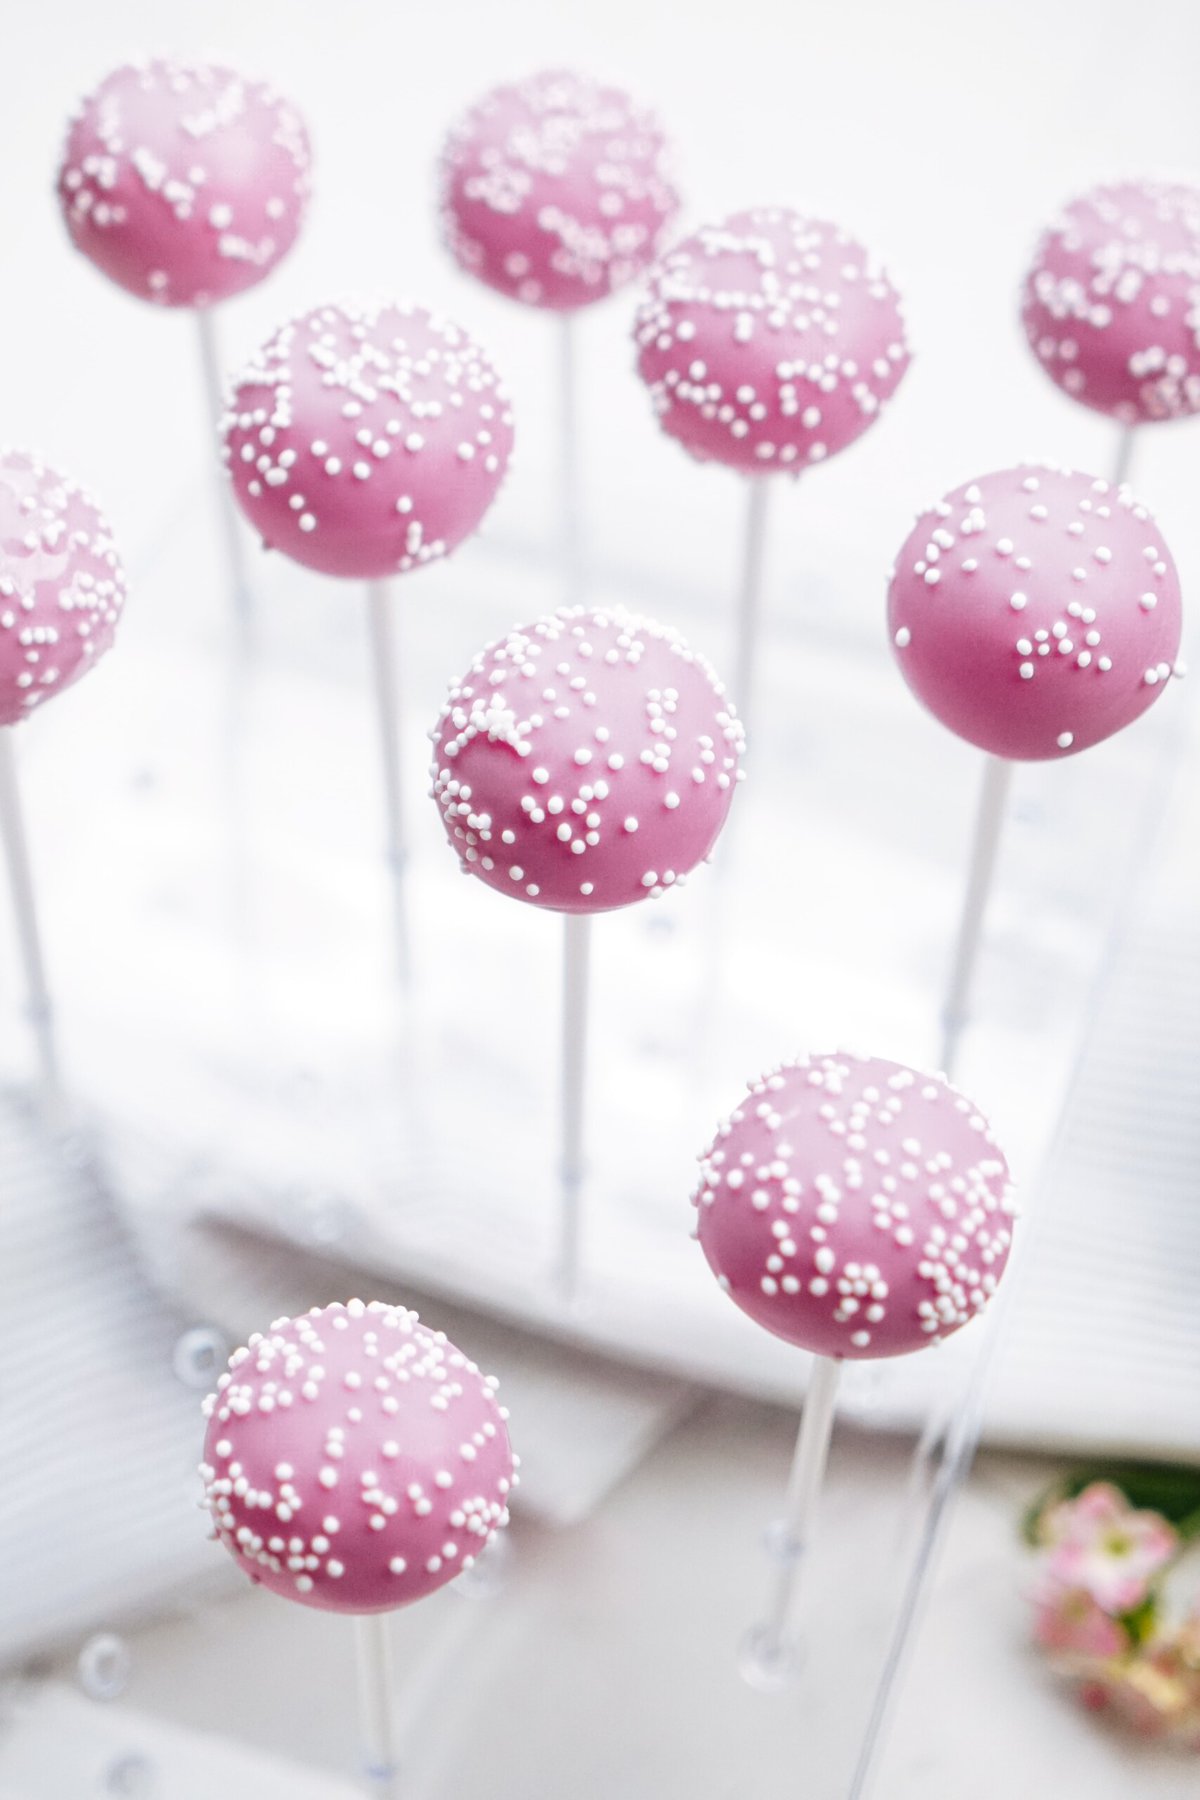
12. Permit Cake Pops to Set
Position right into a cake pop holder – cake pop up (a styrofoam block, a dish with rice to carry cake pops in position, or a field with holes, and many others.). Permit to set utterly, serve and revel in!
Storing Cake Pops
If in case you have leftover cake pops, shop in an hermetic plastic container within the refrigerator to stay them recent and from drying out.
Make Forward: Those will also be made 2-3 days upfront. For best possible effects, stay your cake pops within the fridge till in a position to serve.
To Freeze: If you wish to shop and use them later, after they’ve dried, position in a freezer secure, hermetic container or bag for as much as 1-2 months! Permit to thaw within the refrigerator in a single day.

Pointers for Luck Making Cake Pops
That will help you form uniform cake cakes, use a small cookie scoop then roll along with your palms. Or perhaps a spherical tablespoon would paintings.
Blending an excessive amount of frosting with the cake could cause the cake balls to have an excessive amount of moisture and transform greasy and soggy.
You don’t want to use the double boiler option to soften your chocolate wafers. As an alternative, simply pop the wafers within the microwave and soften in 30-second periods. In case you understand the chocolate is a little bit thick, upload 1 teaspoon of coconut oil to assist skinny it out.
Use a deeper cup, concerning the measurement of a tall ingesting glass for dipping. In case you use a shallow dish, be sure you have a spoon to hand to scoop up the melted chocolate and pour it over to coat flippantly.
Whether or not you purchase one or make one at house, it’ll in point of fact assist stay them upright so they may be able to dry. You’ll be able to make one via poking holes in a field, the use of a styrofoam block or put rice in a tumbler or smaller mason jar.
Extra Candy Treats to Revel in!
Extra Cake Pop Recipes to Make!
With only a few easy substances and simple steps, you’ll be able to create those impossible to resist Starbucks cake pops which can be certain to provoke your family and friends. Say good-bye to lengthy espresso store strains and hi to selfmade deliciousness! Revel in, pals! 🙂
If you’re making this recipe, I might in point of fact recognize it if you happen to would give it a celeb score and go away your evaluate within the feedback! If in case you have an image of your completed dish, publish it on Instagram the use of the hashtag #laurenslatest and tagging me @laurens_latest.
Starbucks Cake Pop Recipe
Save your self some cash and a shuttle to Starbies via making my Starbucks Cake Pop Recipe, both in your subsequent party or simply because! Everybody loves them!
Directions
-
Preheat oven to 350° F (or no matter your cake combine calls for).
-
Combine and bake vanilla cake combine consistent with bundle instructions. Relying on which logo of cake combine you utilize, you could want to alternate the measurements for eggs, oil, and water indexed.
-
Take away cooled cake from the pans and the use of a big sharp knife, take away the darkish outer hardened layer of the cake. Discard or save for snacking. That is an non-compulsory step however I feel it makes for a greater ball-rolling enjoy if the onerous outer edges are got rid of.
-
In a stand mixer with the paddle attachment (or hand mixer), disintegrate cooled cake. Combine in vanilla frosting. The mix will have to be wet and stick in combination simply. If the dough is simply too dry, upload in additional frosting a tablespoon at a time.
-
Line baking sheet with parchment paper and the use of a cookie scoop, scoop cake balls onto the baking sheet. Roll every ball along with your palms. If the dough sticks on your palms, you’ll want to wash them from time to time.
-
Duvet with plastic wrap and freeze cake balls for approximately half-hour. Take away from freezer and provides every ball a moment roll with the palm of your palms. This may make certain an flippantly spherical ball. Duvet and position again into freezer for 1 hour.
-
Proper earlier than you are ready to tug out your cake pops, soften chocolate. Microwave chocolate wafers in a microwave-safe bowl or cup (ideally a tall one who you’ll be able to simply dip the cake pop in). Get started out with 30 seconds, stir, after which soften at 20-second increments till melted. Watch out to not overcook the chocolate or it’ll snatch up!**
-
If the chocolate is simply too thick, you’ll be able to upload a tiny quantity of coconut oil to skinny it out, simply watch out to not upload an excessive amount of for the reason that chocolate gained’t set! You’ll be able to additionally use Crisco shortening.
-
Take away cake pops from the freezer. Dip the top of a cake pop stick into the melted chocolate and slide about two thirds the way in which thru a cake pop ball. The chocolate will act as a glue for the stick. Do that with all 40 cake pop sticks, hanging every one again on baking sheet as you cross.
-
If this step is taking you a very long time to do, you could imagine re-freezing your cake pops for quarter-hour or so and re-melting the chocolate. It is a normal rule right through this whole procedure.
-
Now you are ready to dip! Maintaining the cake pop via the ground of the stick, position the wrong way up into the cup of melted chocolate, turning a little bit to get each and every piece of the cake ball coated.
-
Let as a lot chocolate drip off as conceivable, gently tapping at the facet of the cup to take away extra.
-
Shifting temporarily, enhance with white sprinkles earlier than the chocolate units.
-
Position right into a cake pop holder – cake pop up (a styrofoam block, a dish with rice to carry cake pops in position, or a field with holes, and many others.).
-
Permit to set utterly, serve and revel in!
Notes
**Paintings in small batches! Pour ⅓ of the bag of chocolate within the bowl after which as soon as it’s used up, soften some other ⅓ of the bag, and so forth.
Vitamin
Energy: 109kcal | Carbohydrates: 15g | Protein: 1g | Fats: 5g | Saturated Fats: 2g | Polyunsaturated Fats: 2g | Monounsaturated Fats: 1g | Trans Fats: 0.1g | Ldl cholesterol: 14mg | Sodium: 94mg | Potassium: 14mg | Fiber: 0.1g | Sugar: 10g | Diet A: 20IU | Calcium: 26mg | Iron: 0.3mg
Leave a Reply